Welcome back to the Toy Chest!
Back in the day the person I shared the majority of my love for G.I. Joe with was my one cousin who I’d get to be really tight with later through middle and high school. Just like with my buddy that was into Transformers, if there was a figure or vehicle that I didn’t have, this cousin would. We would spend the day at each others’ house, meet up at my grandma’s, or wherever, and together we could field a pretty impressive army with just about every major vehicle represented. (Except the Flagg, neither of us came from that kind of money)
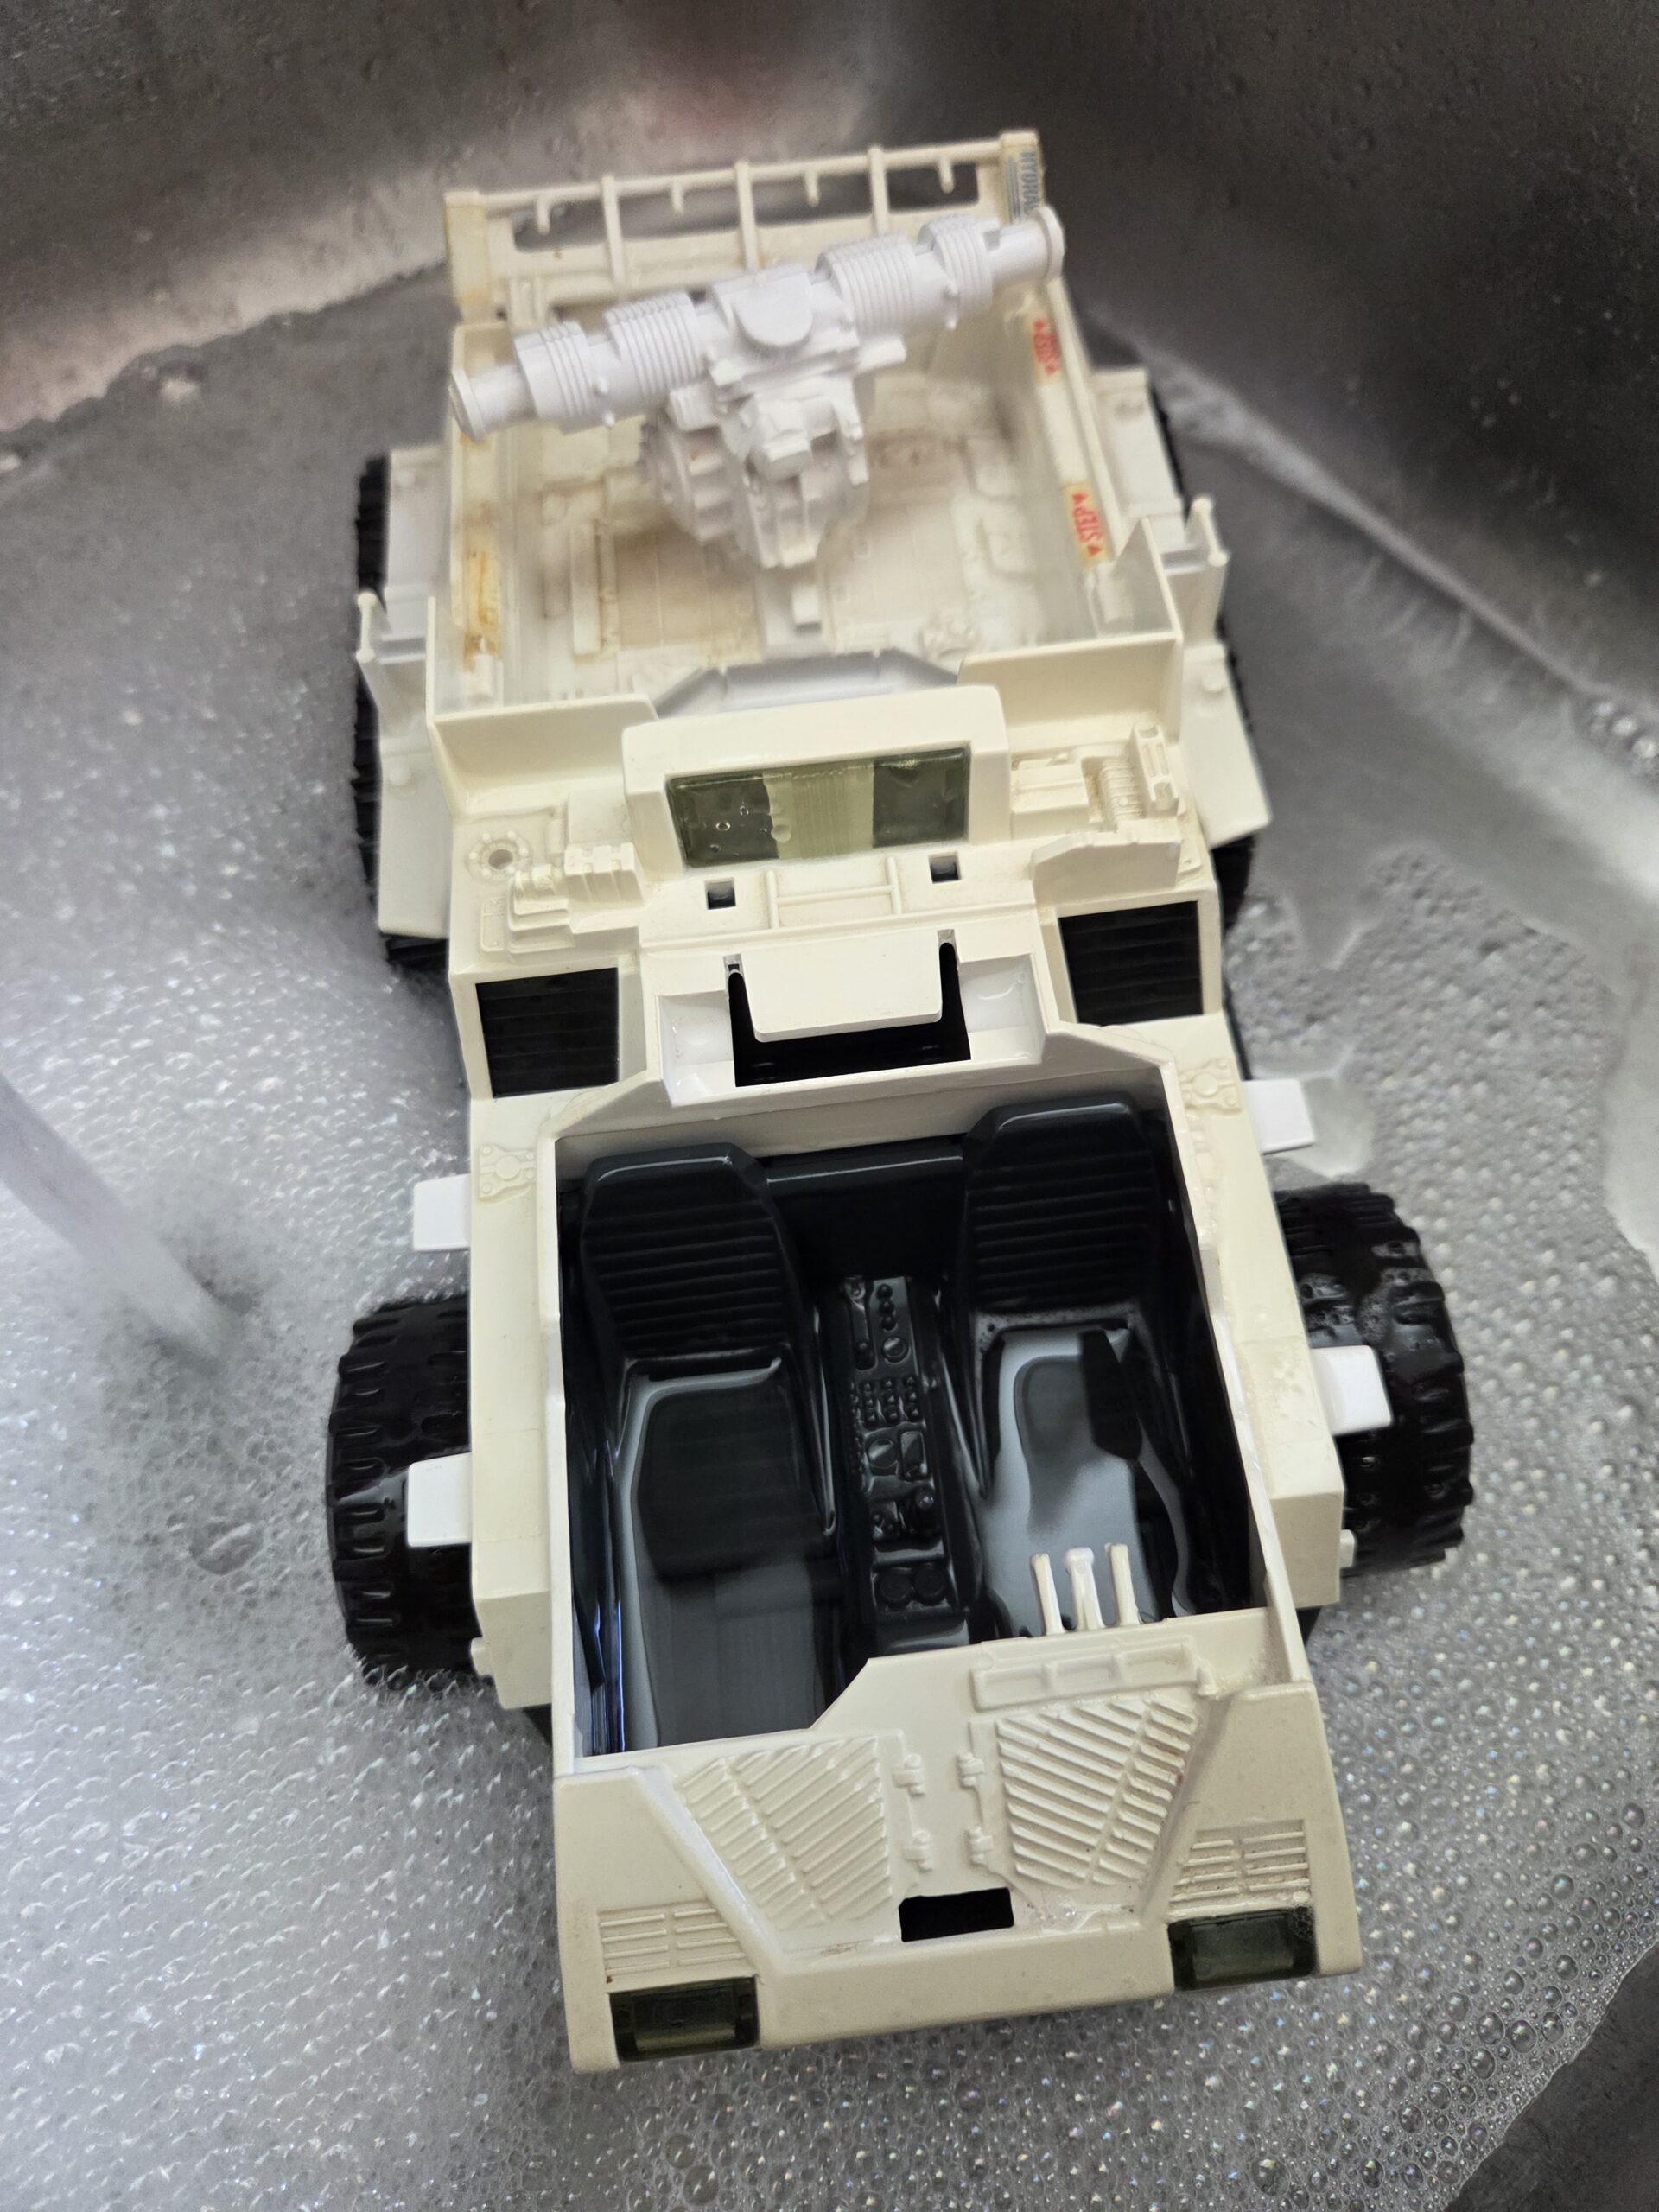
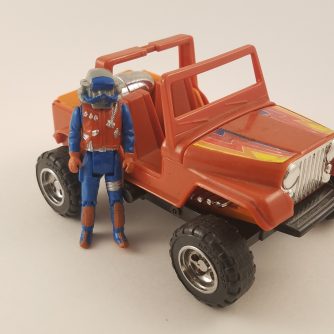
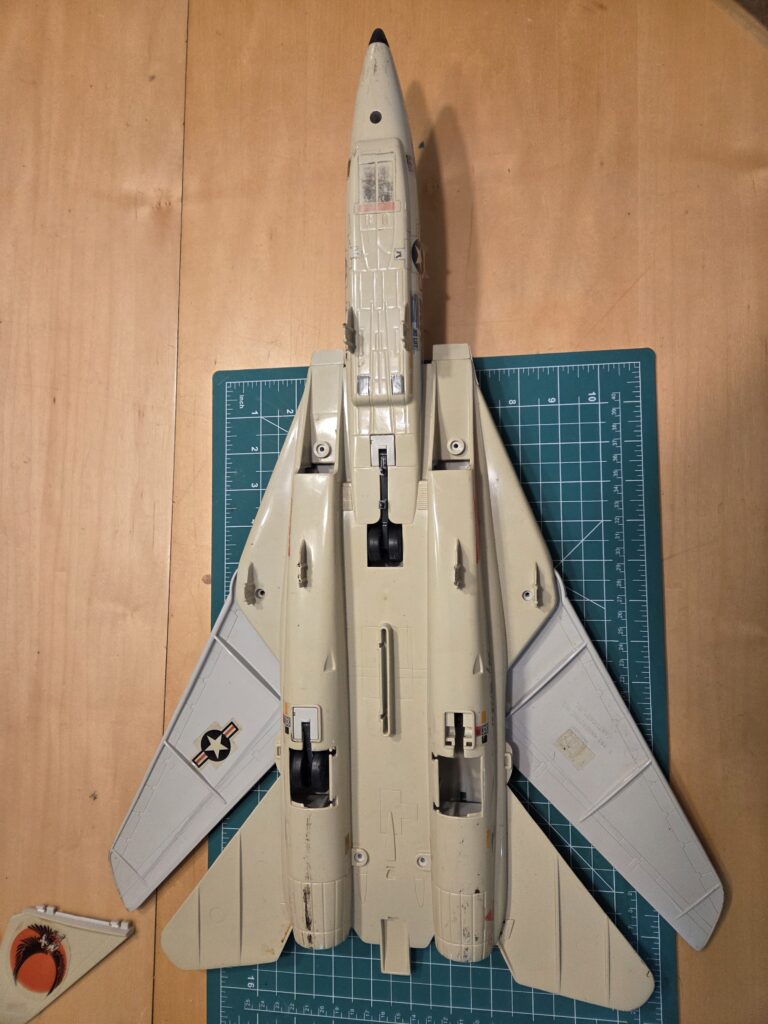
One vehicle I always wanted, and he actually had, was the legendary Skystriker jet. At the time that it came out in 1983, the Joe line had only been around a year or so but this was the most impressive vehicle they had released yet. The number of missiles and bombs alone were outrageous at the time. It was based on the U.S. Navy’s F-14 Tomcat, which meant it was a two man jet and even featured a mechanism to make the wings sweep back just like a real F-14. That same mechanism also raised and lowered the landing gear. Toss in removable seats equipped with working parachutes and this plane was about as detailed of a toy as anyone could want.
Anyway, as I said I never had one new, but at some point probably between ‘85 and ‘87 my cousin decided he didn’t want that plane anymore so he offered it up to me. Obviously I accepted immediately and I was super stoked to have a Skystriker in my arsenal even if it was road hard by the time I got it. It was in rough shape, he was not gentle on his other toys that’s for sure, and this Skystriker was no different. What I got was basically a shell of the original toy.
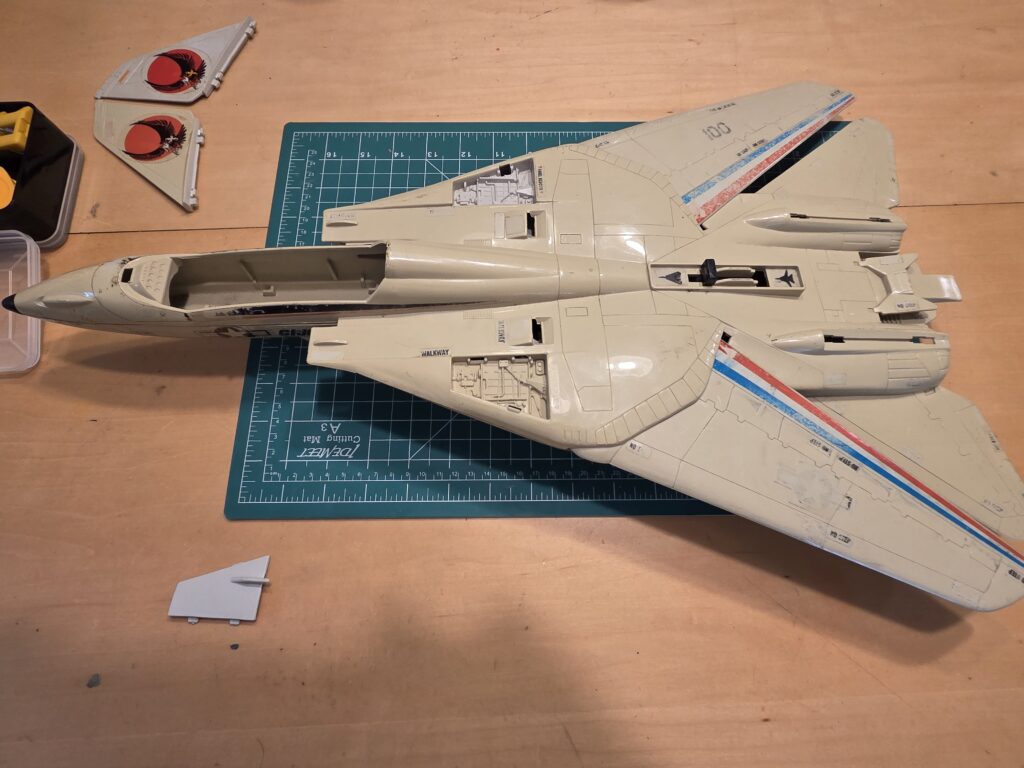
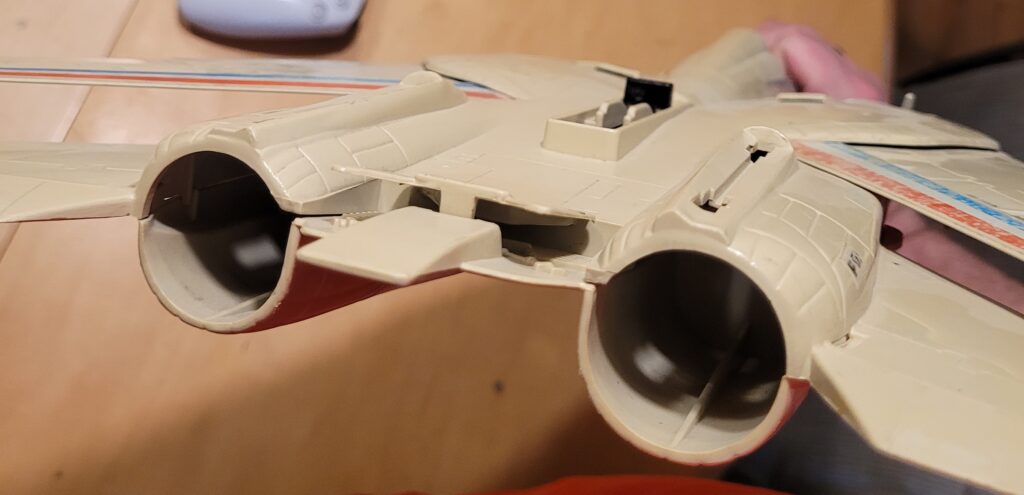
It was missing both engines, a tail fin, a seat and the cockpit canopy.
It was also missing just about all of its missiles and other small parts as well as the fragile parachutes. I also didn’t receive the pilot, Ace, as part of the deal, which was fine, I really just wanted the jet anyway. (Note: While putting this post together, I realized one of the missile posts is actually BROKEN OFF! Oh no. Not sure how I’ll fix that, but there must be a way)
Overall it didn’t bother me, my imagination filled in the missing pieces and I used the hell out of it until my Joe playing days were over, which really wasn’t too long after I inherited that thing. But I kept it just like all of my other toys and it sat in storage ever since.
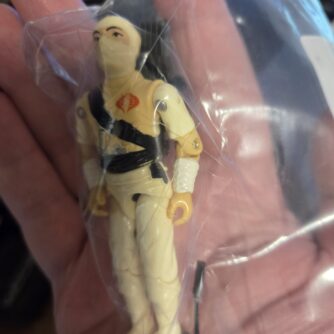
Recently, I got interested in restoring these old toys, and even had success whitening and restoring a Storm Shadow. After that went so well I knew just what my next project would be. It was time to break out the Skystriker and clean it up, find the pieces it had always been missing, and make it better than when I first received it.
The real inspiration for taking on this project was seeing just how well the hydrogen peroxide whitening trick worked on that yellow Storm Shadow in the last Toy Chest. I had seen videos of people doing the same thing to a Skystriker and mine was beyond just a little yellowed. It was downright disgustingly discolored from sun damage and being stored in not one but two smoking houses growing up (my cousin’s and mine).
The first priority was going to be whitening the fuselage pieces and wings, and then after that I would source the pieces that I was missing. I ended up doing things a little backwards from how I planned because once I started scouring ebay I found that a lot of these parts are not only hard to find in an unbroken state, they’re pricey even when they are broken.
So I started picking up pieces here and there for a few weeks, especially pieces that would need to be whitened along with the rest of the fuselage. I wanted to do all the whitening at once because another thing I realized after starting down this road was I was going to need A LOT of peroxide since the Skystriker is so large even the pieces are pretty big when disassembled which was going to require a larger container than I originally anticipated. Large container needs a ton of liquid to fill it.
So not only was a sourcing parts over the course of a few weeks I was also building a stockpile of peroxide, a case at a time from Costco. I’m sure I’m on some kind of watch list by now.
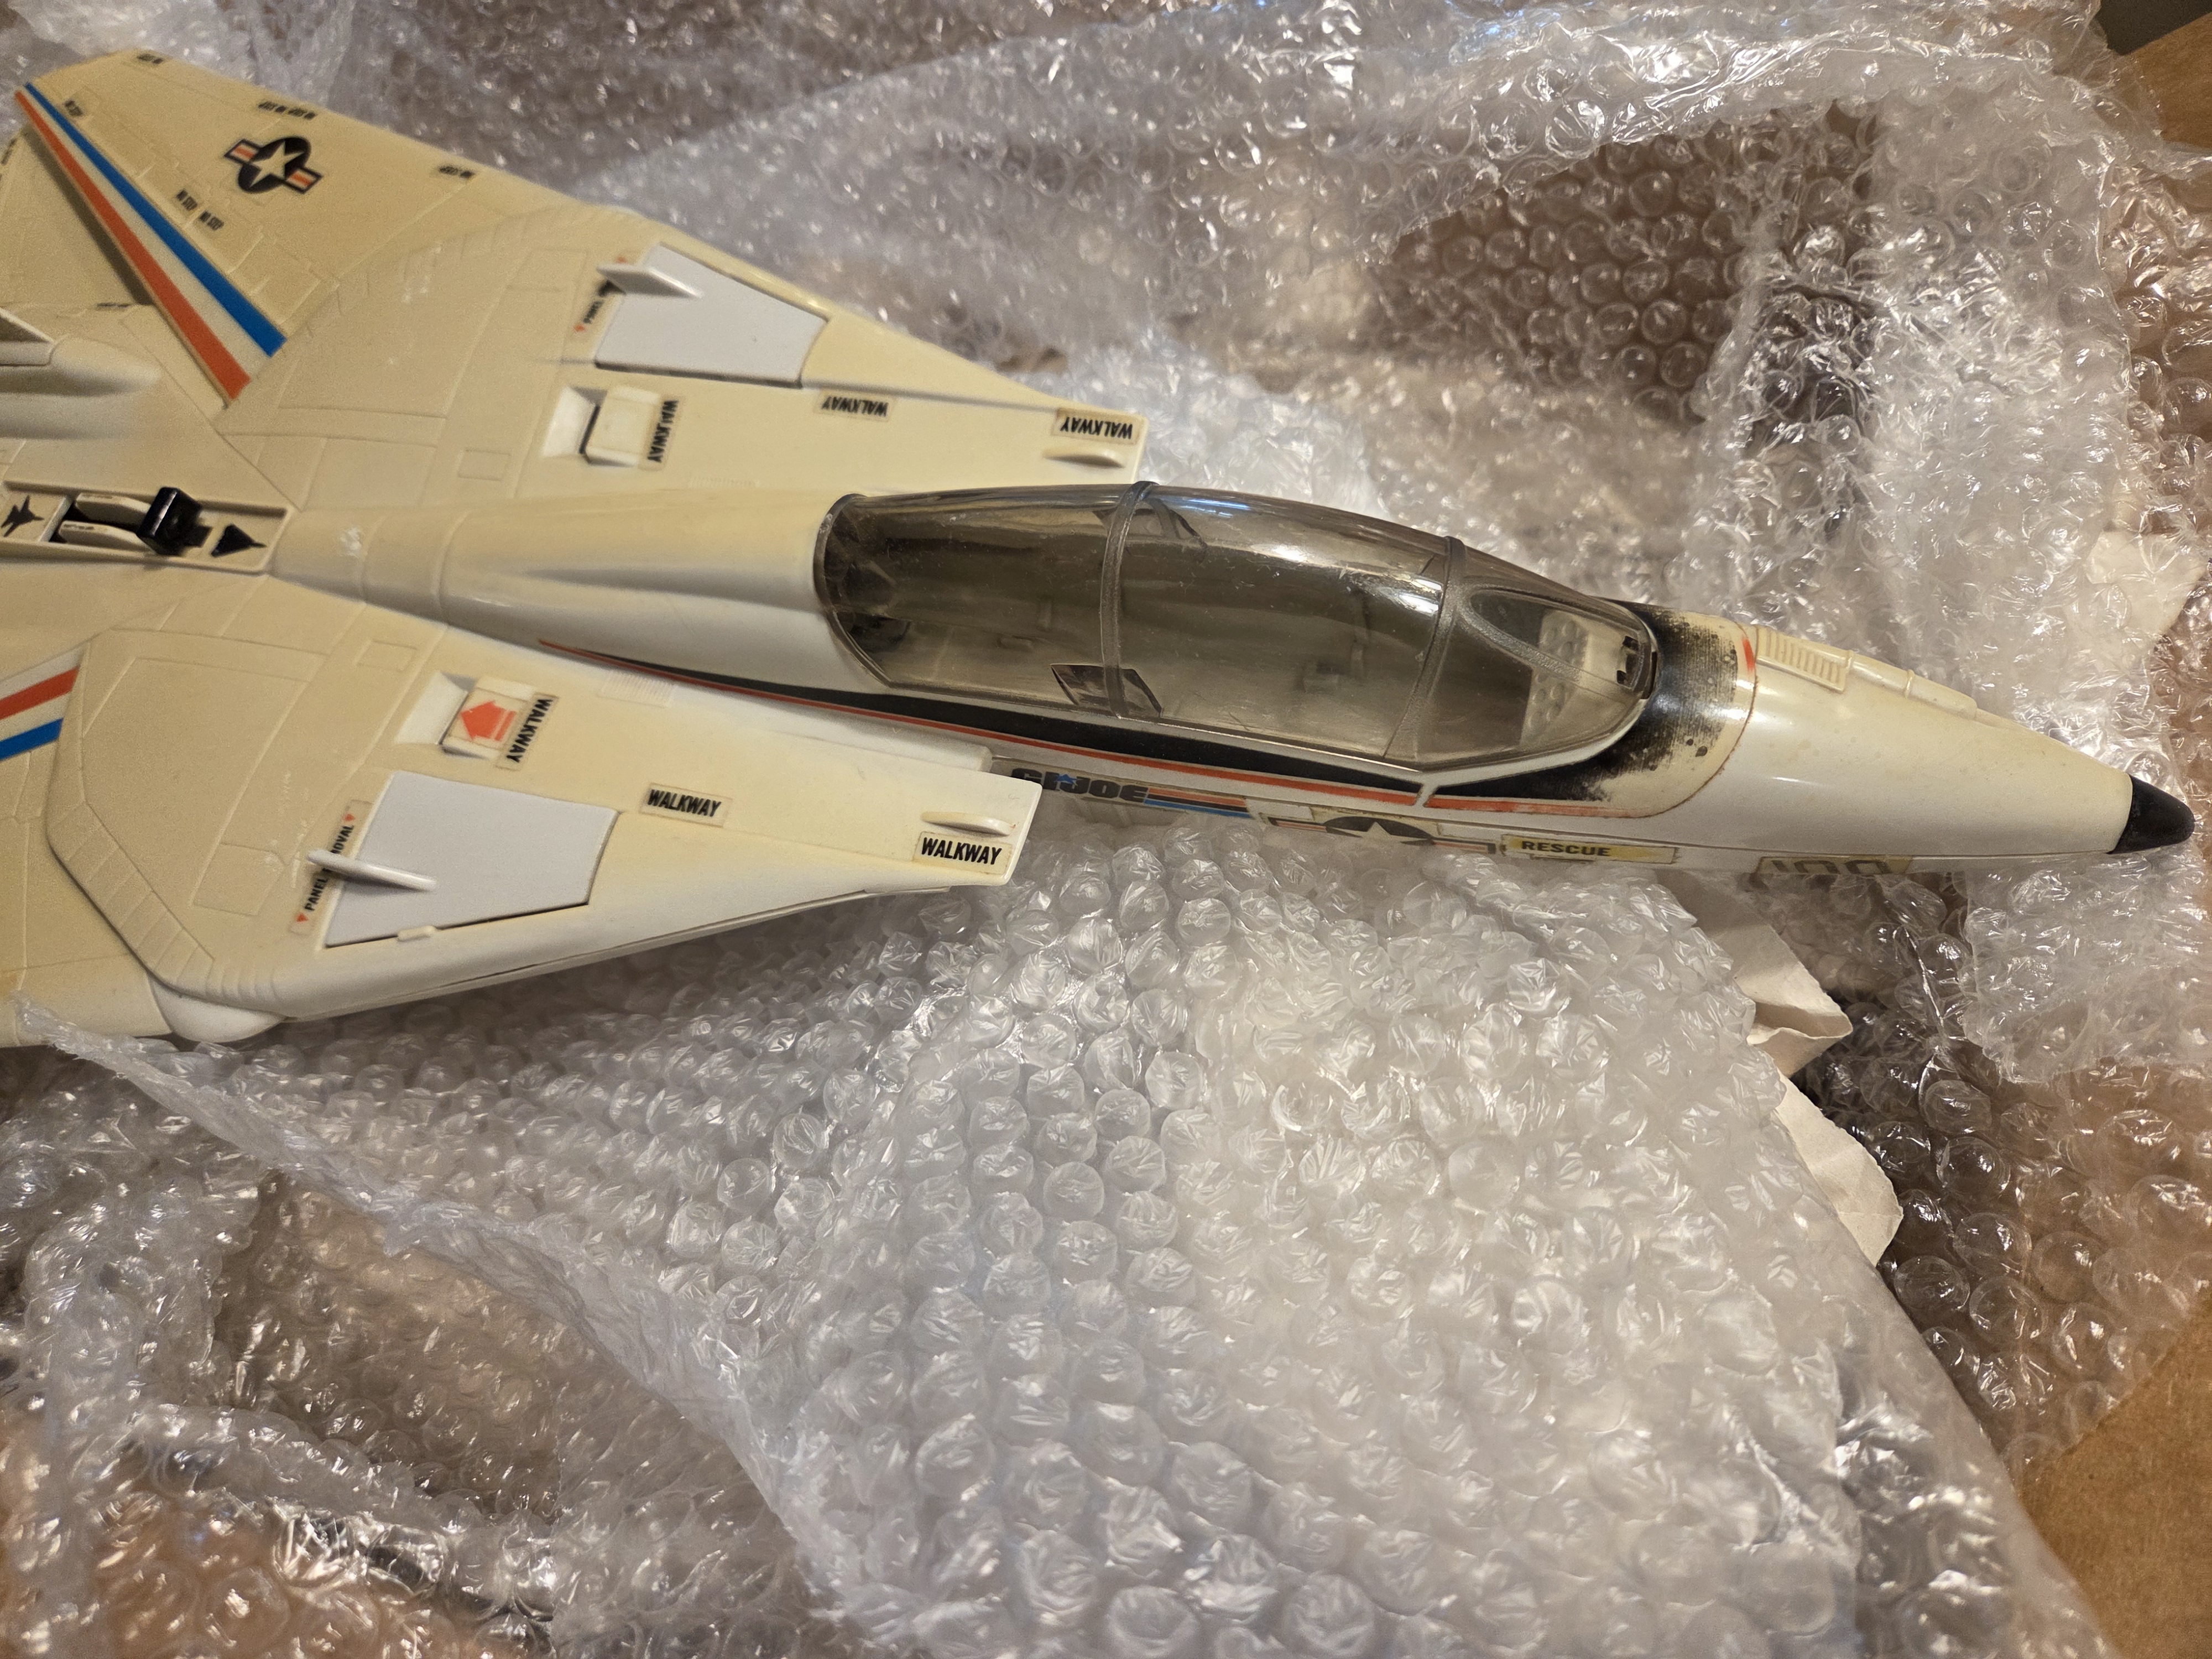
Here’s where I’m going to mention a funny thing that happened when I was searching for a canopy. Apparently, like a lot of vehicles, the Skystriker has a couple of known design flaws and weak spots. One of them happens to be the clips that attach the canopy to the fuselage. Finding a canopy with those tabs intact was a lot more difficult than I thought. Everyone selling them individually only had broken ones. I considered just settling for a broken one, it would still look fine for display, the hinge just wouldn’t work to open it up like it was intended. All of the broken ones were listed for about $25-30 plus shipping and the one example of an unbroken one I could find was about $70. But then I found a listing I hadn’t even considered. I found someone selling a gross beat up shell (kinda like mine). It was missing a ton of pieces, probably more than mine even, except it had a perfectly intact canopy. The best part was it was only about $40. Now with some outrageous shipping it still ended up in the $60-70 range, BUT for that price I got a pretty nice looking canopy and BOTH engines, plus a tail fin and a couple other small bits. What’s more, I figured if this first restore went well maybe I would restore this donor plane down the road.
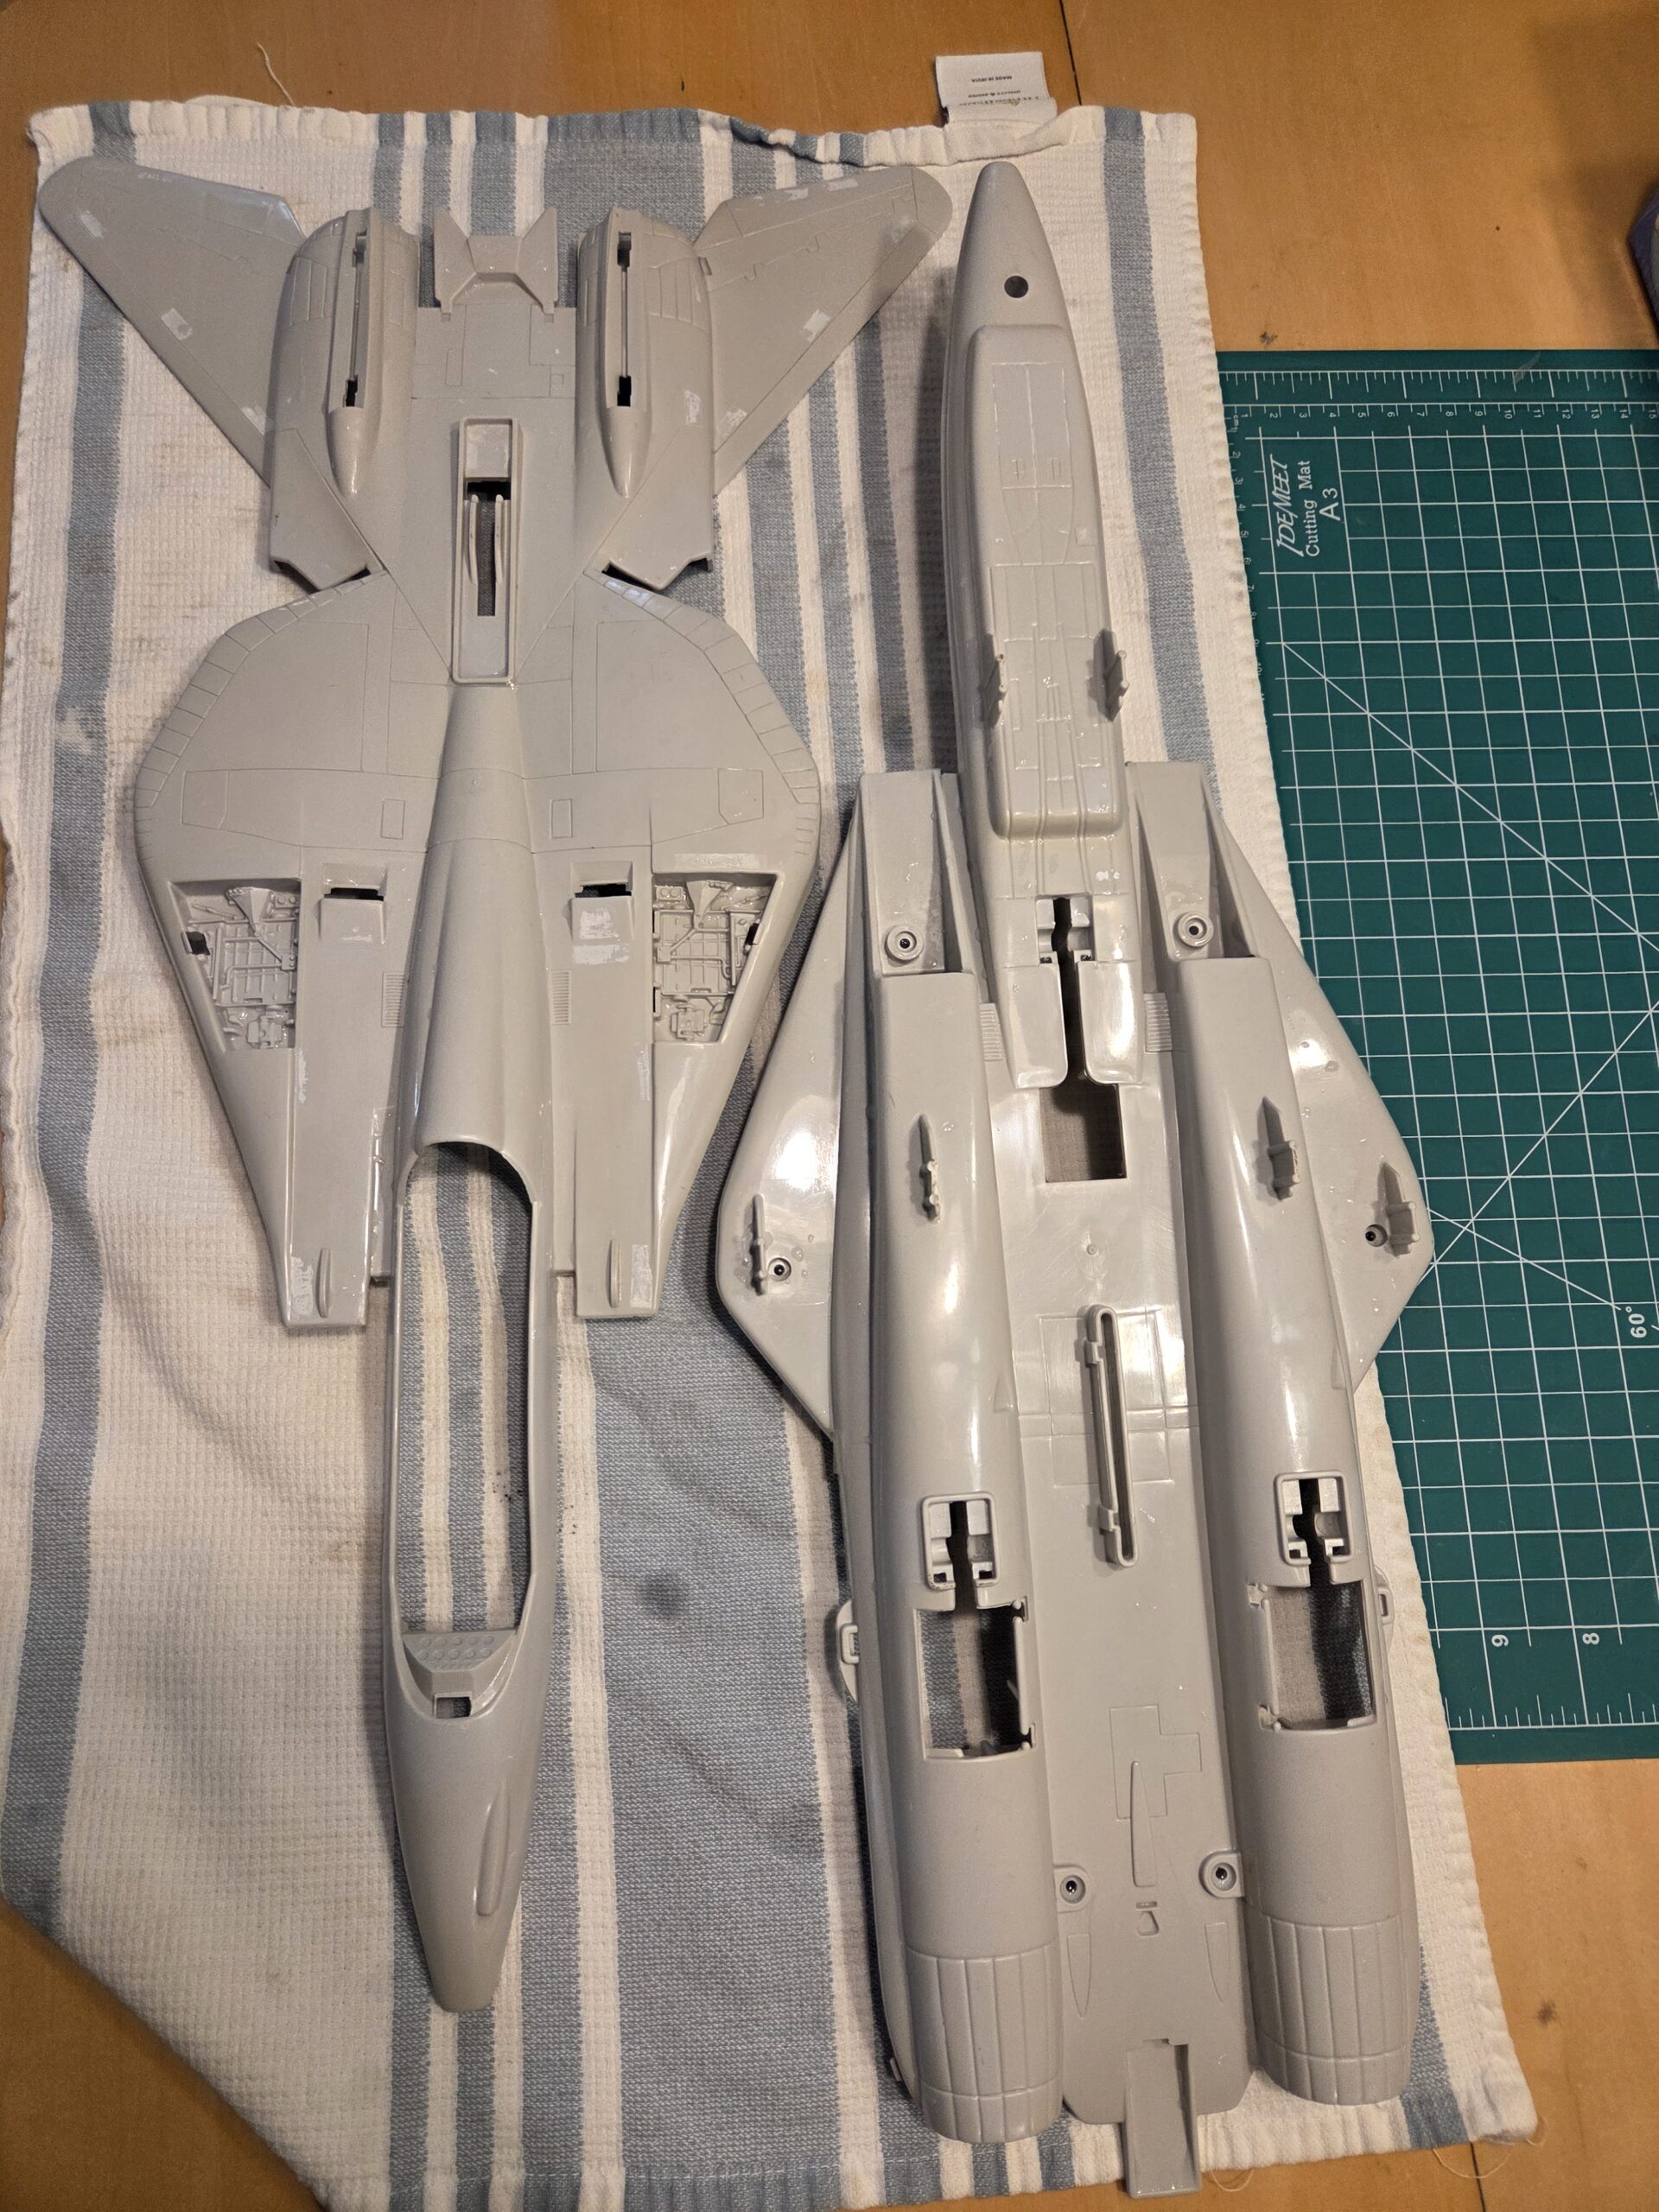
Here is the donor plane fresh from the shipping container
Here is my Skystriker in its original condition. You can see how filthy and discolored it is. The stickers are all faded and worn, and really brittle. When I went to remove them they just literally popped off with just the tiniest amount of pressure.
That’s an important thing to note. If you’re going to peroxide these vehicles you need to get the stickers and leftover glue residue removed beforehand if possible. The peroxide will ruin the stickers, and the residue will mess with the whitening in those spots. So it’s best to get rid of them first.
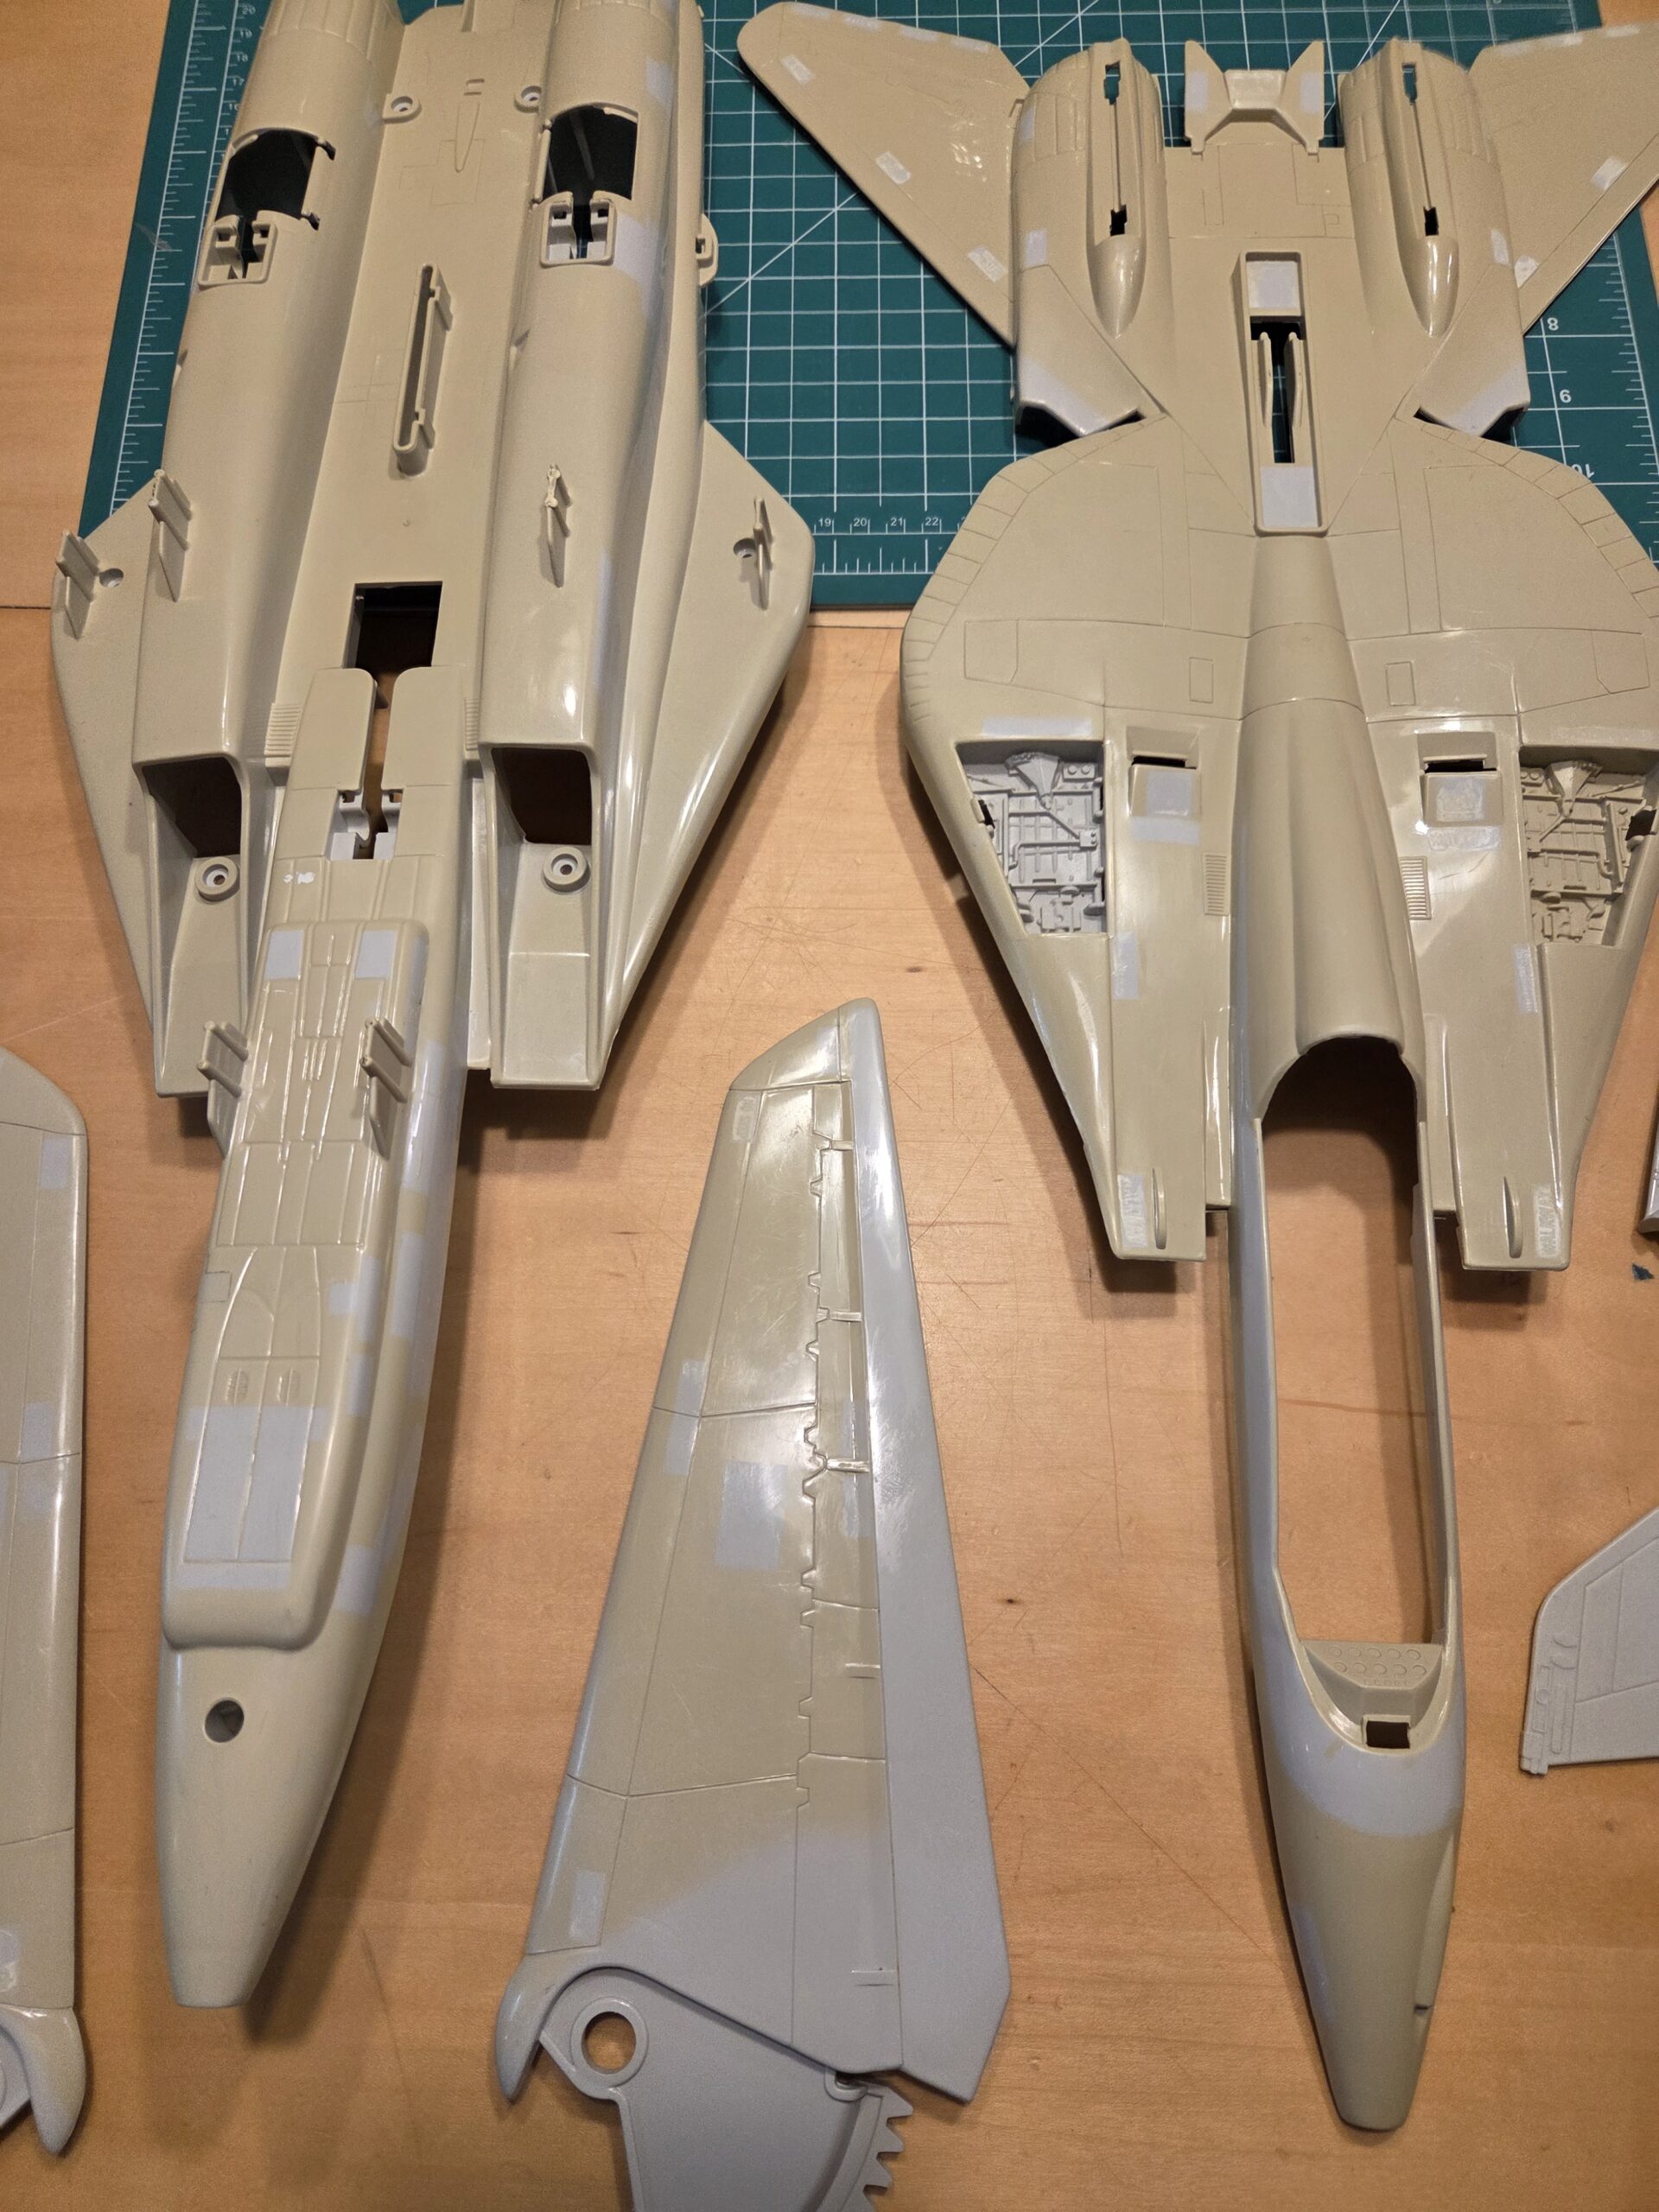
Finally I couldn’t take it anymore and just jumped into disassembling the planes. I should have done the donor plane first in case I messed up but I didn’t. I didn’t actually need to take it apart to get the pieces I needed so I didn’t. Luckily, they’re surprisingly easy to take apart, and for as complicated as they seem on the outside with the moving wings and landing gear, the actual mechanism inside is crazy simple. One thing about these old Joe toys is they really did do a great job engineering them. Later vehicles would get more and more simplified cookie cutter builds that were much less fragile, but the earlier ones were really almost works of art.
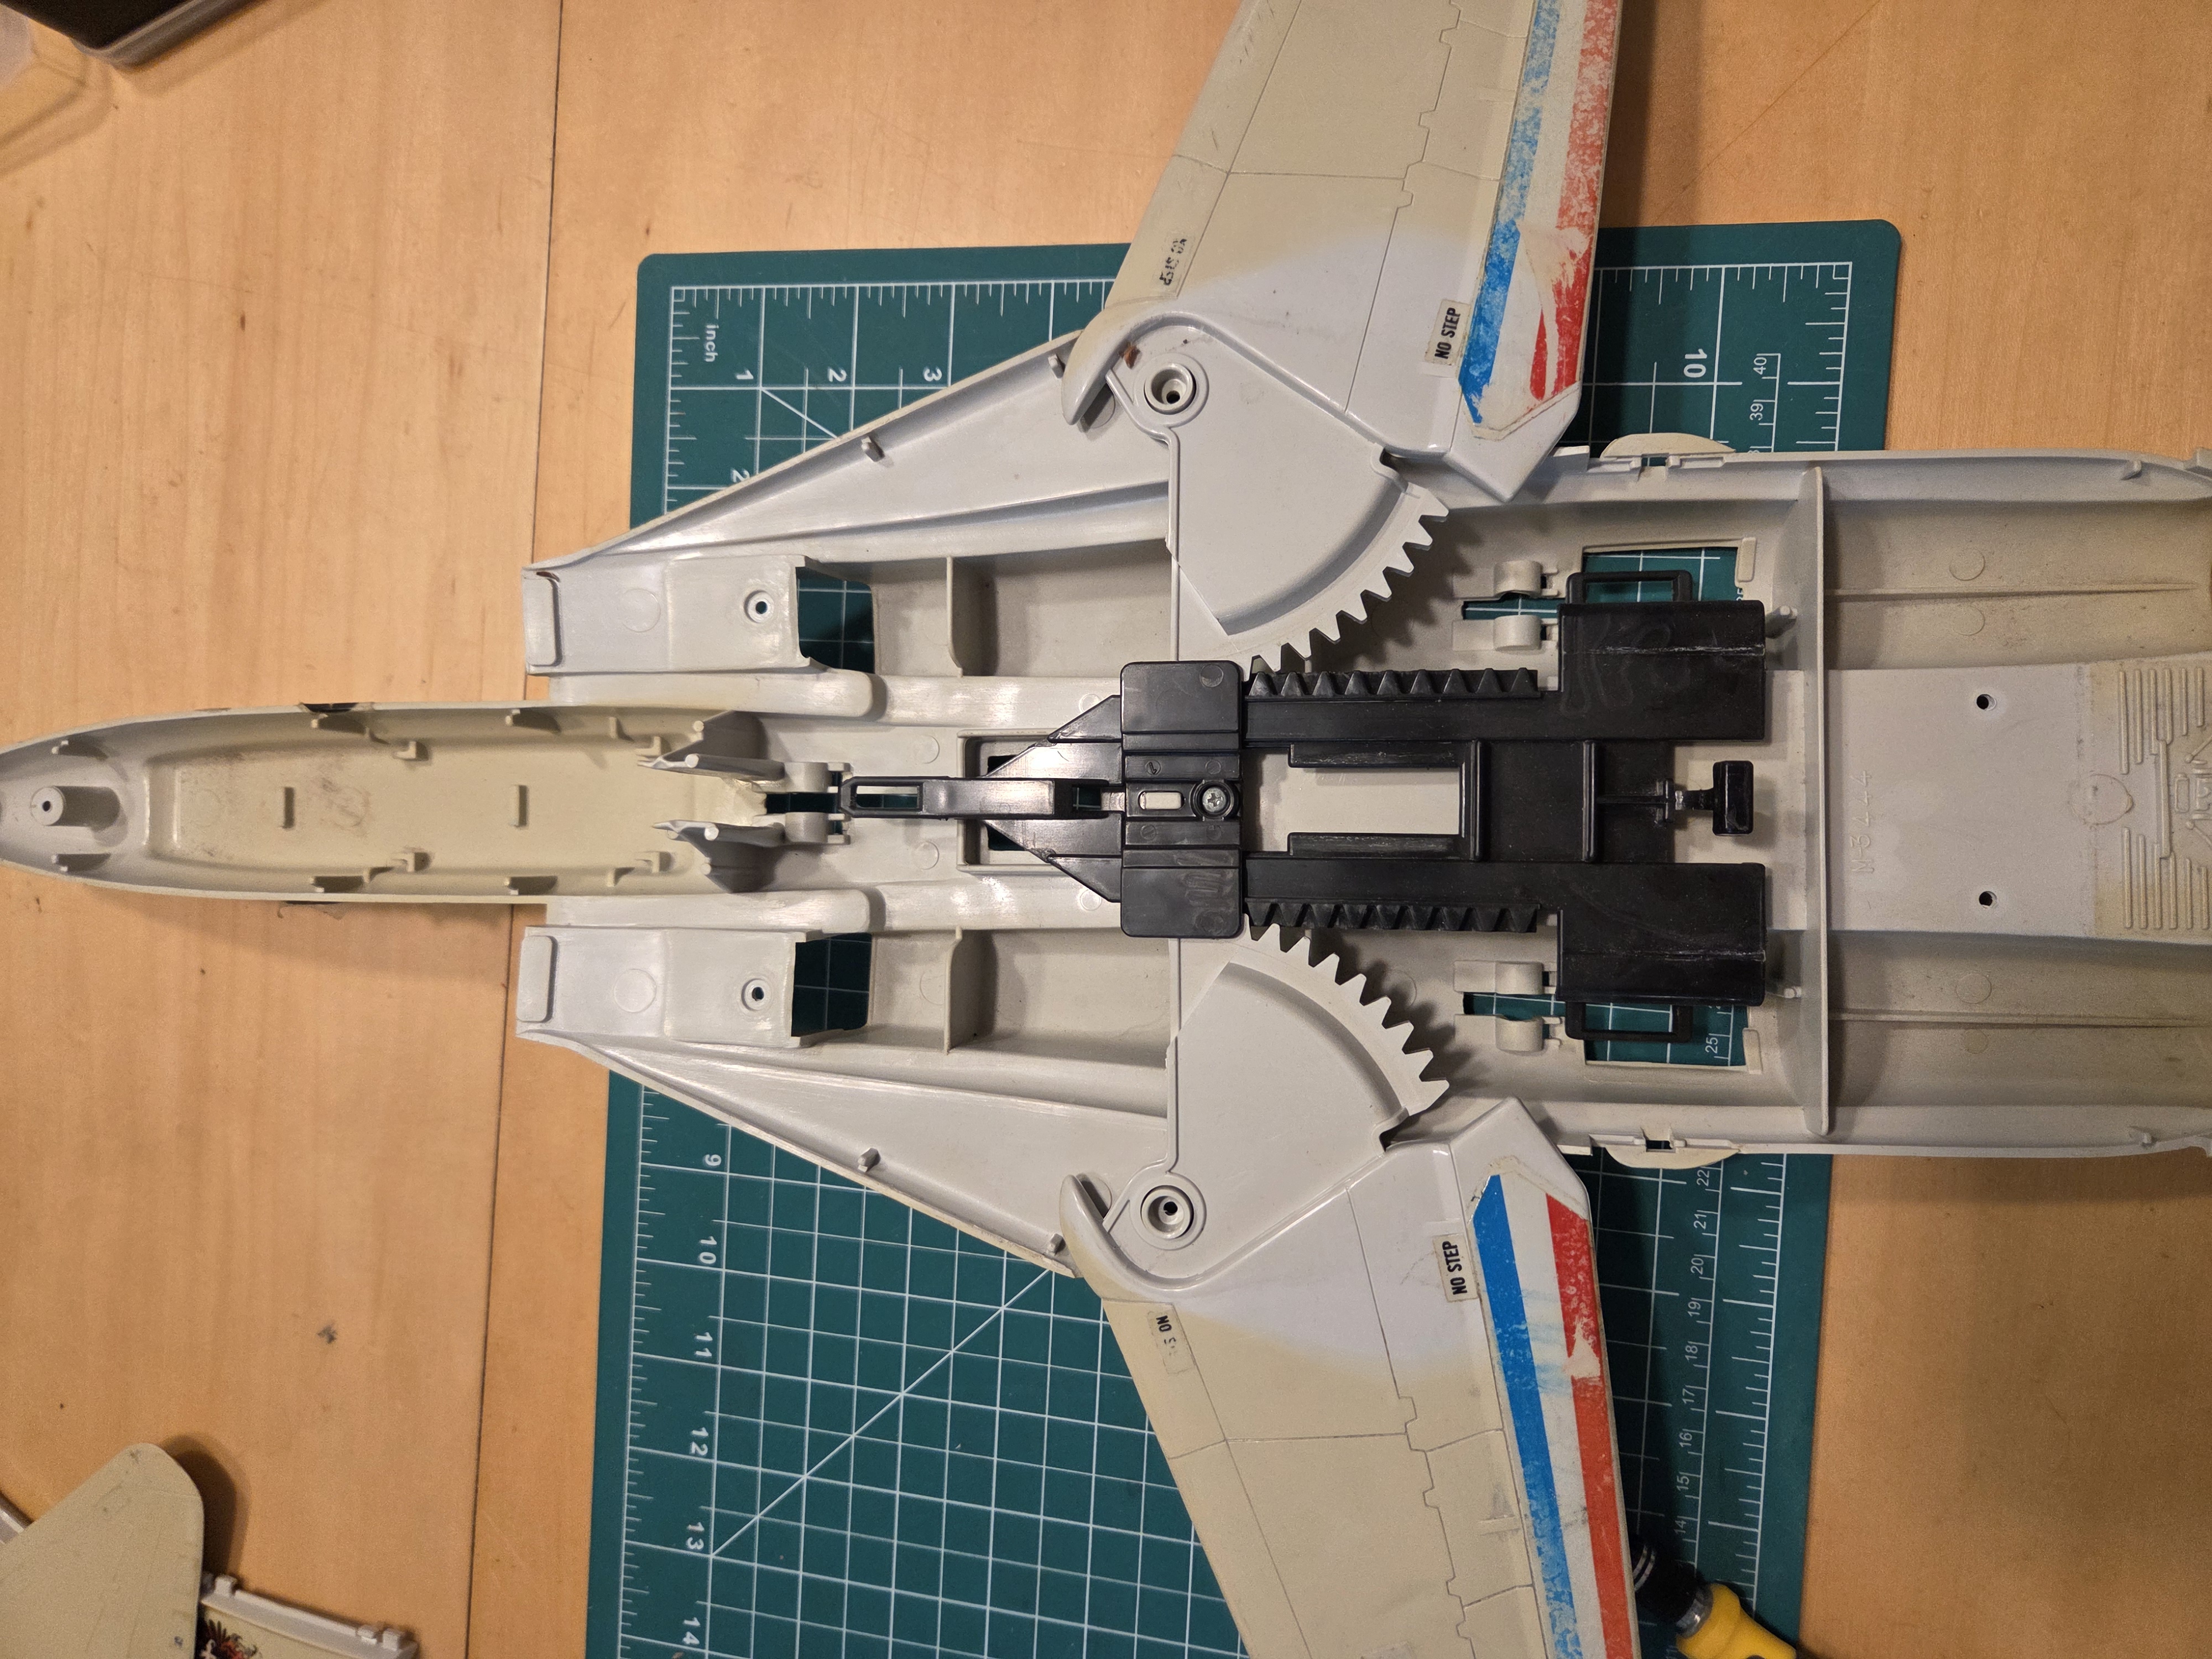
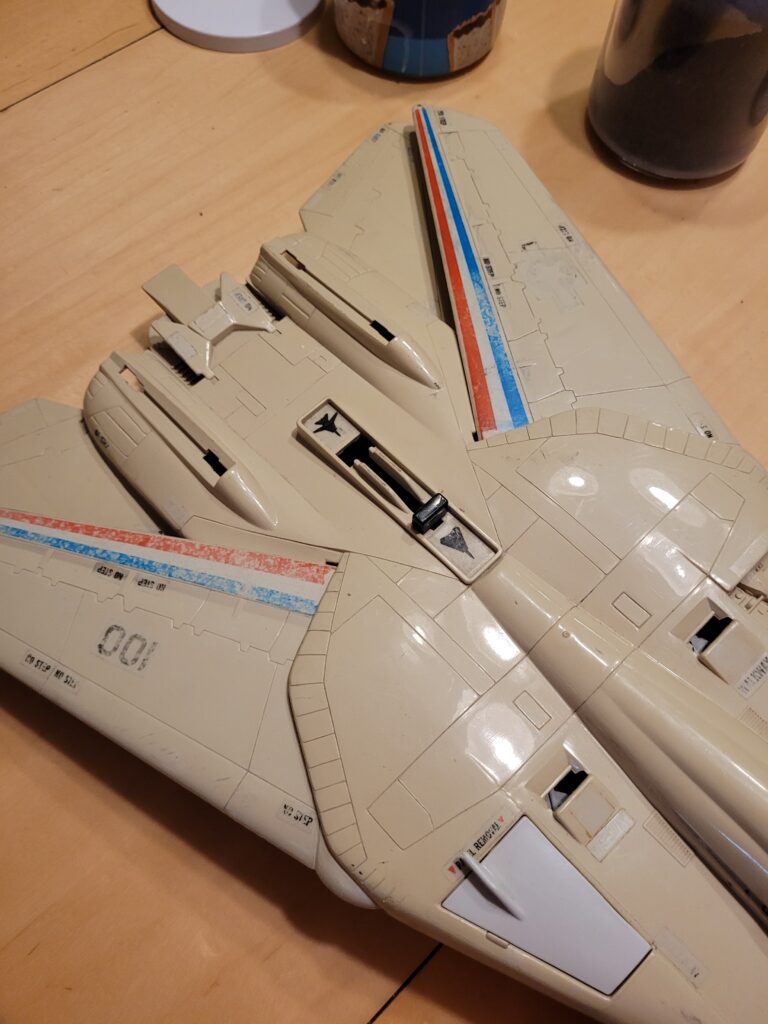
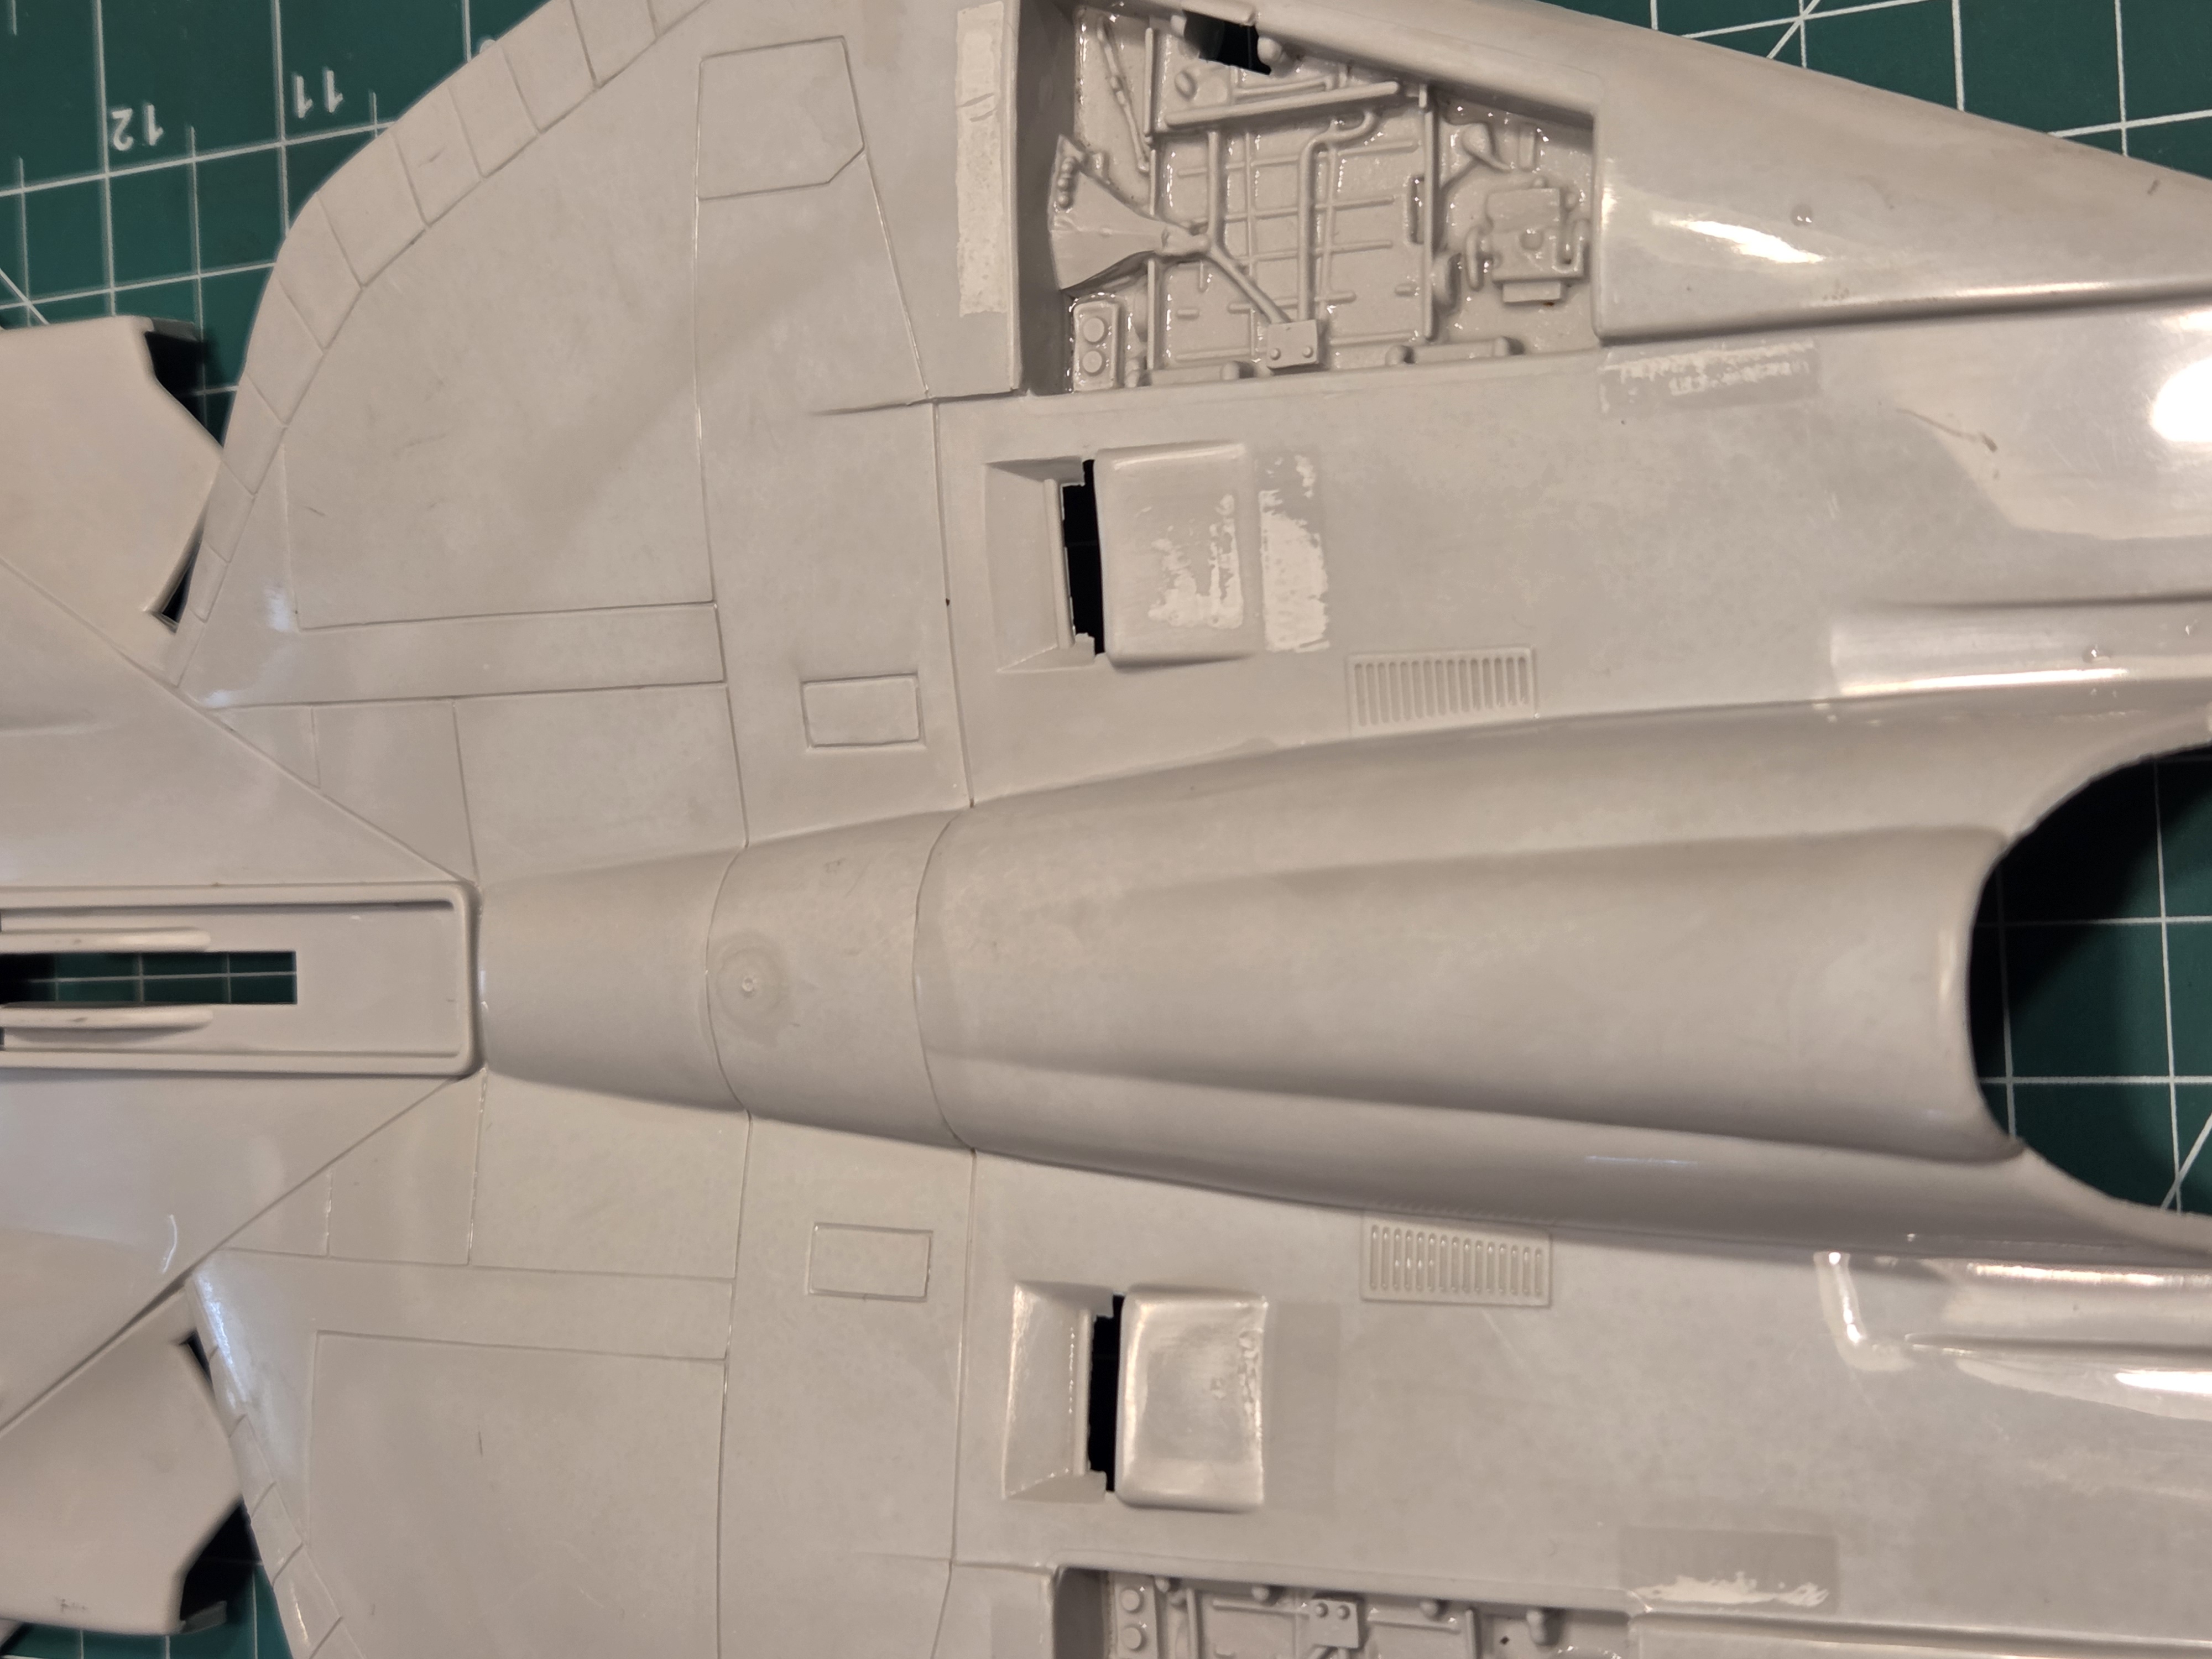
It’s crazy that under all the decals you can see the original color of the plastic still. This is good to use as a guide when whitening to see how close you’re getting to the right color.
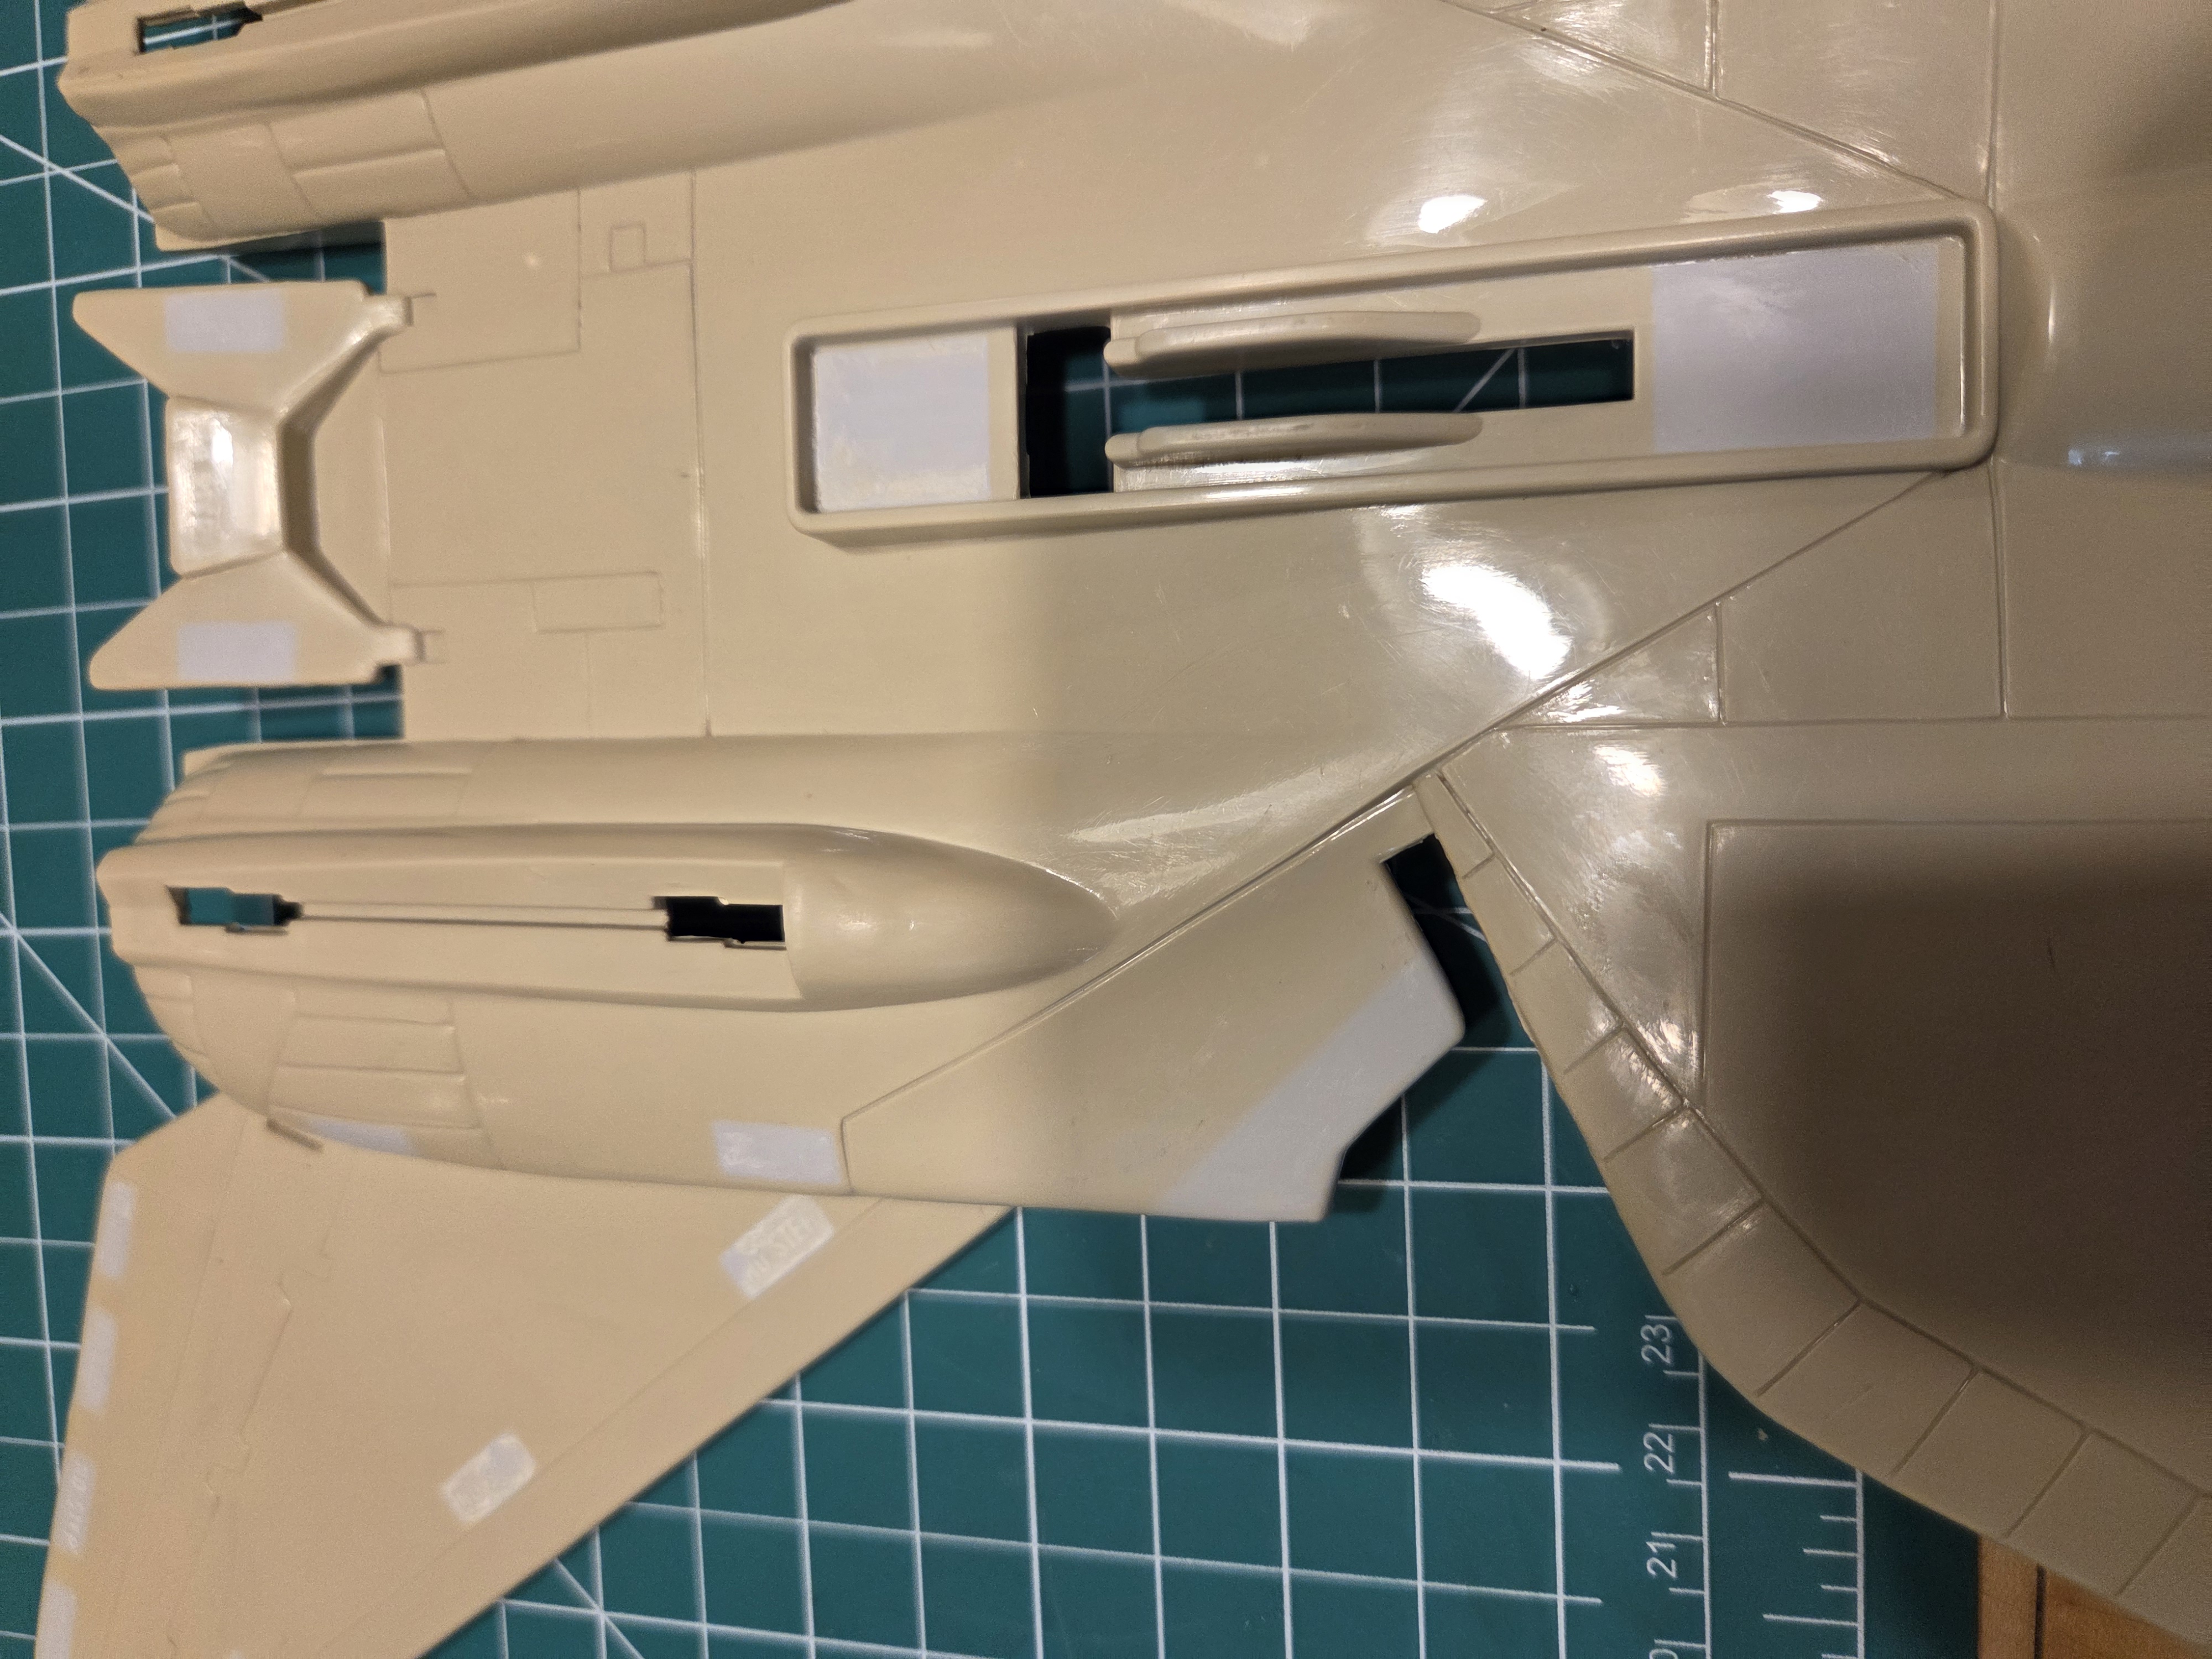

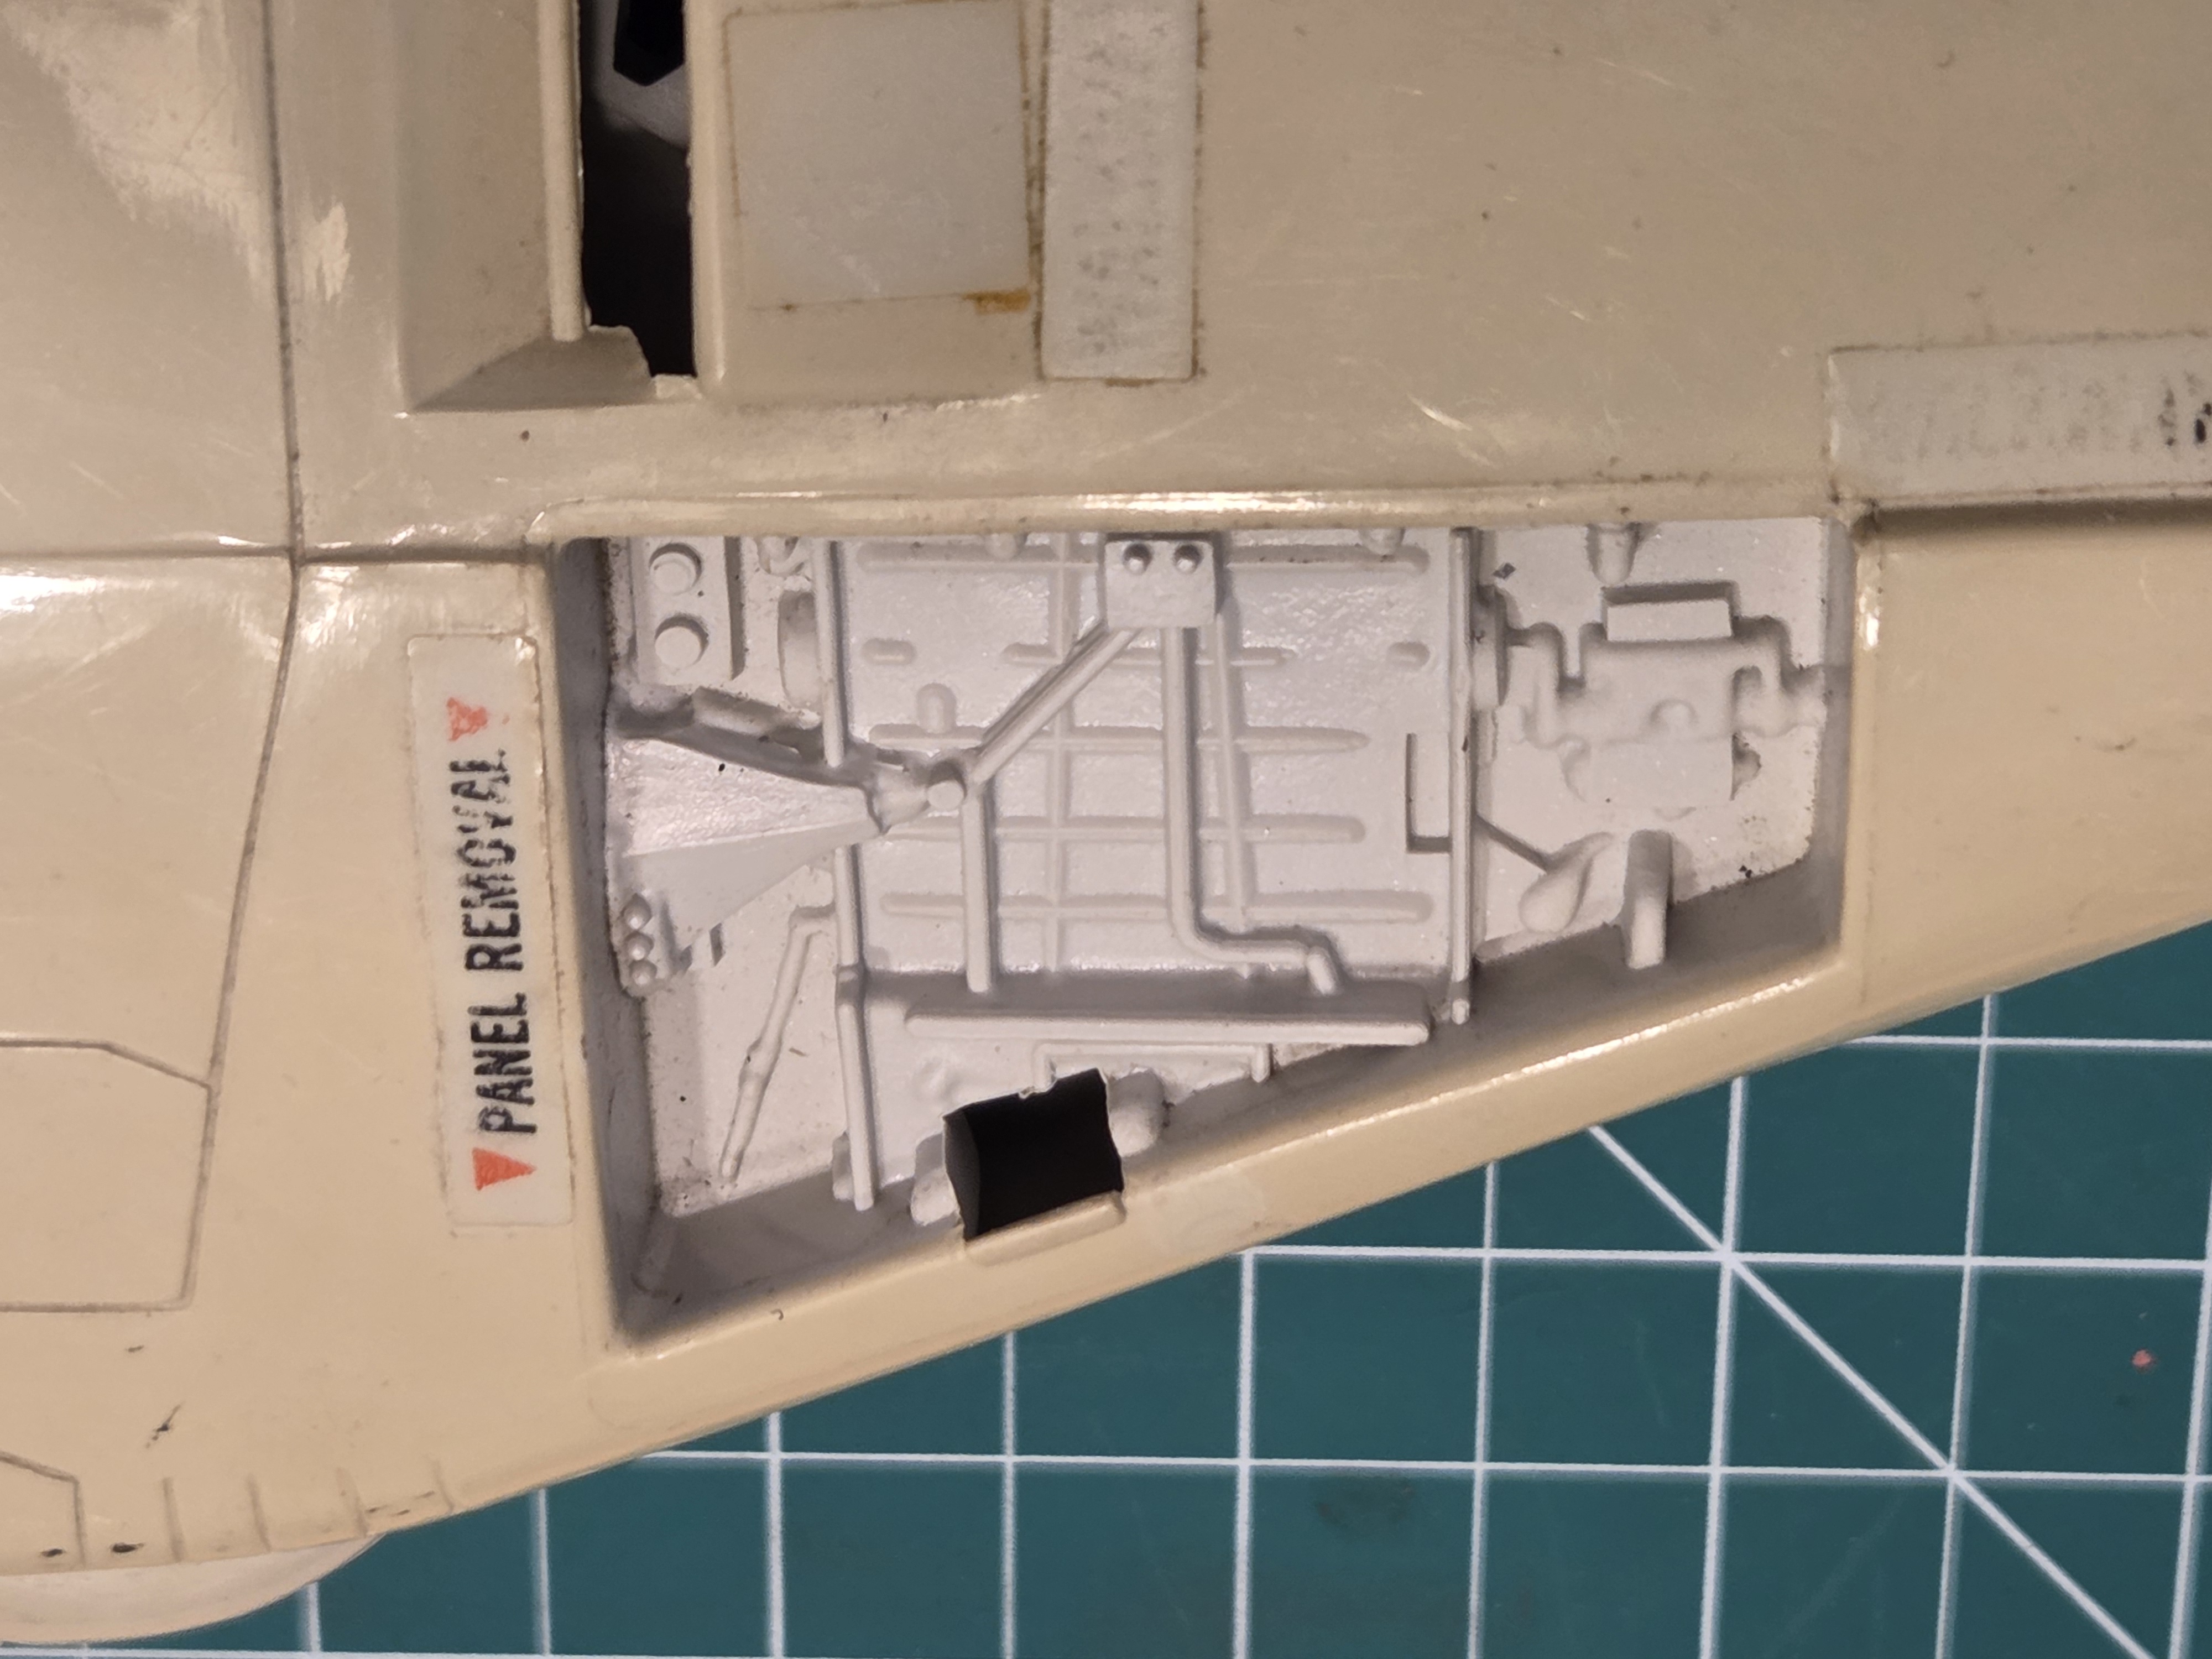
You can see inside the service compartments is the original color as well. Some of the parts like the maintenance hatch covers are made from a different kind of plastic than the rest of the plane because they almost never yellow. Same with the landing gear clips/covers.
Once all of the decals were off and the plane was in pieces it was time to start whitening.
I thought I would be able to use a plastic bin that I already had as the container but I quickly find out that it was not nearly big enough. Oops! So I ended up spending a lot of time searching for an appropriate container that would be big enough to fit all the parts but not too deep either. I finally found a bin for under bed storage that would work. It was just about the perfect size, a little bit too big but not too bad. You want a bin that is just big enough for the parts you have without a lot of extra space, otherwise you’ll end up using a lot more peroxide than you need to cover all the pieces.
Once again I went back to the same location where I did the Storm Shadow whitening, my deck. It has completely unobstructed full sun for most of the day. This time I set up a table to put the bin in and started filling it with peroxide. It ended up taking 26 bottles of peroxide to fill the container a little over halfway which was just deep enough to submerge the fuselage halves. I was used just straight up 3% liquid peroxide that you can get at the drugstore (or Costco in bulk). I had read that 3% works just fine just slower than the 12% cream I used on Storm Shadow so I went with the cheaper option since I would be using so much.
I had to use some drinking glasses and pot lids to hold the pieces down though, they kept wanting to float up outside the peroxide. I had seen conflicting advice about this, some people swear you don’t have to submerge the pieces entirely and that the gas from the peroxide/UV light reaction will take care of any exposed bits, but other people said submerged is the only way to go and if part of it comes out of the liquid it could end up staining the plastic. So I decided I would go with the majority consensus and keep everything under the solution.
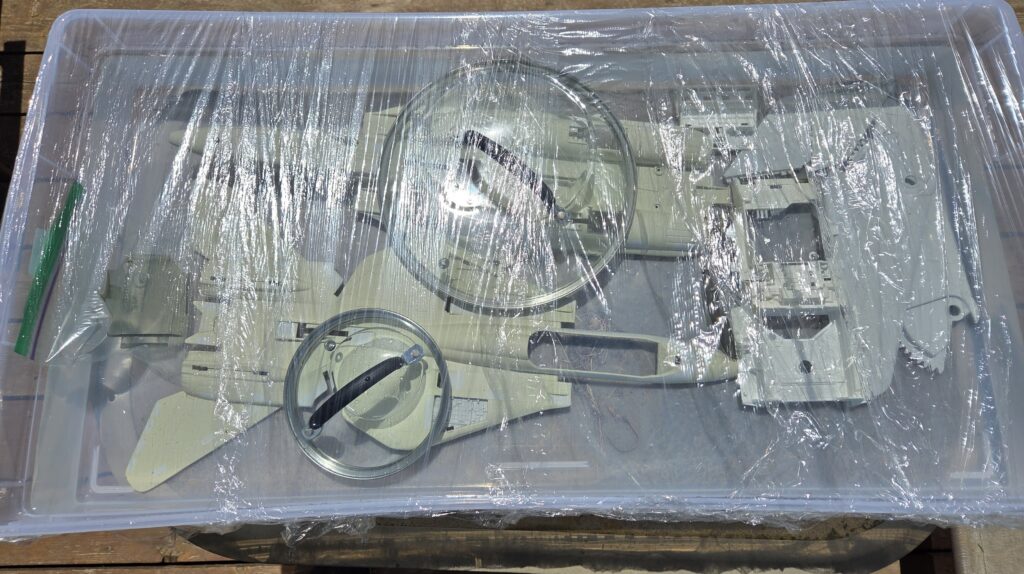
I covered the bin with plastic wrap to seal in all the gasses and then let it sit for a few hours. I really had no idea how long it would take, I just knew the recommendation was to check on the progress often to avoid doing it too long and damaging the plastic.
After the first day there was a dramatic improvement in the color but it still had a noticeable yellow tint. I could tell just by comparing it top side and under side of the wings that a lot more whitening still needed to happen.
I left the bin full, covered and brought the pieces inside overnight. The next day I repeated the process and left them sit in the sun for several hours. Again there was a ton of improvement but it wasn’t quite there yet.
I probably could have stopped at this point and it would have been 95% fine, but it was really bugging me that there were a few stubborn spots. So, I went back at it for a third day.
After the third day I pulled the parts out and washed them off, and that’s when I noticed it. Somehow either part of the top fuselage had come up out of the water where the glass pot lid was holding it down OR the glass had acted as a magnifier and that ring where the lid was ended up bleaching out much more than the rest. I also realized there were spots all over the fuselage that were lighter than others. I had officially messed up and gone a bridge too far and scarred the plastic a little.
I was crushed. I had checked it diligently all day and nothing looked amiss. That’s when I learned that how the part looks when it’s submerged is not necessarily how it looks after it’s pulled out and dried off.
It was here that I almost boxed everything up and scrapped the whole project. Looking at the fuselage and wings I could tell overall the plastic had gotten much lighter than I intended even aside from the messed up bits. I set it aside for a couple of days and then decided maybe I could fix it. Maybe if I gave it more time it would eventually lighten up more evenly and at least look better.
I gave this guy two more full days in the sun. At this point I was like fuck it, it’s already imperfect so what’s the harm.
When I finally pulled the pieces out of the solution for the last time, after a total of about 6 days, I was relieved and pleased to see that my gamble paid off. At least somewhat. The dark ring on the top of the fuselage definitely got lighter and now blends a bit better with the surrounding areas. Something I wasn’t expecting though is that because the areas that had stickers on them weren’t yellowed, they really didn’t bleach out as much as the rest of the plane so you can still see their faint outlines. I’m hoping to fix that by putting reproduction decals there eventually.
My fuckup also convinced me to try a final step that I was initially going to skip because I had heard mixed opinions (again, shocking) on whether it really did anything or not and frankly it sounded messy and unlikely to be any real benefit. This last step is supposed to return some color and shine to the plastic after the bleaching process and since I had messed it up so bad I hoped this might even out the overall color and improve the over-whitening.
What is this step, you ask? Why, it’s rubbing the whole plane down with Baby Oil. Yep. You read that right. Topical, huh?
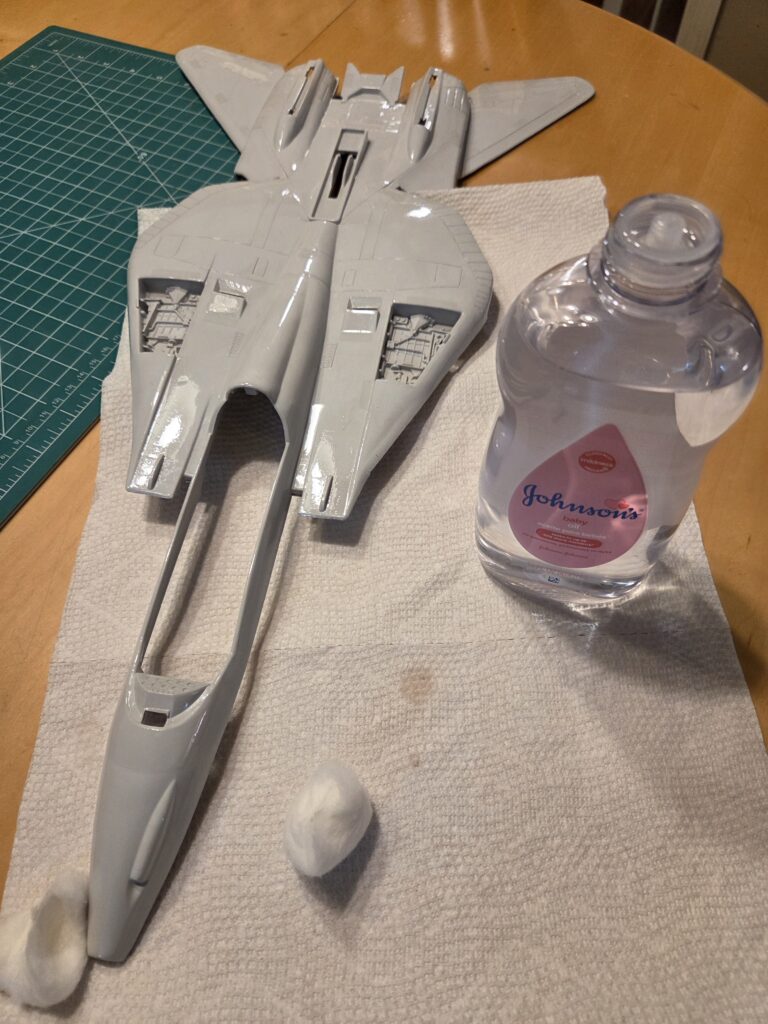
So I purchased a small bottle of plain old baby oil and got to slathering. I tried not to overdo it because the idea is the oil will absorb some into the plastic and then after a day or so you remove the excess with a rag and buff it to a nice shine. In stark contrast to certain celebrities, I figured being light on the oil would mean easier cleanup later.
Surprisingly, the oil did seem to make the color even out a bit, and it did add a little life and shine to the somewhat dried out plastic. It could just be my imagination though.
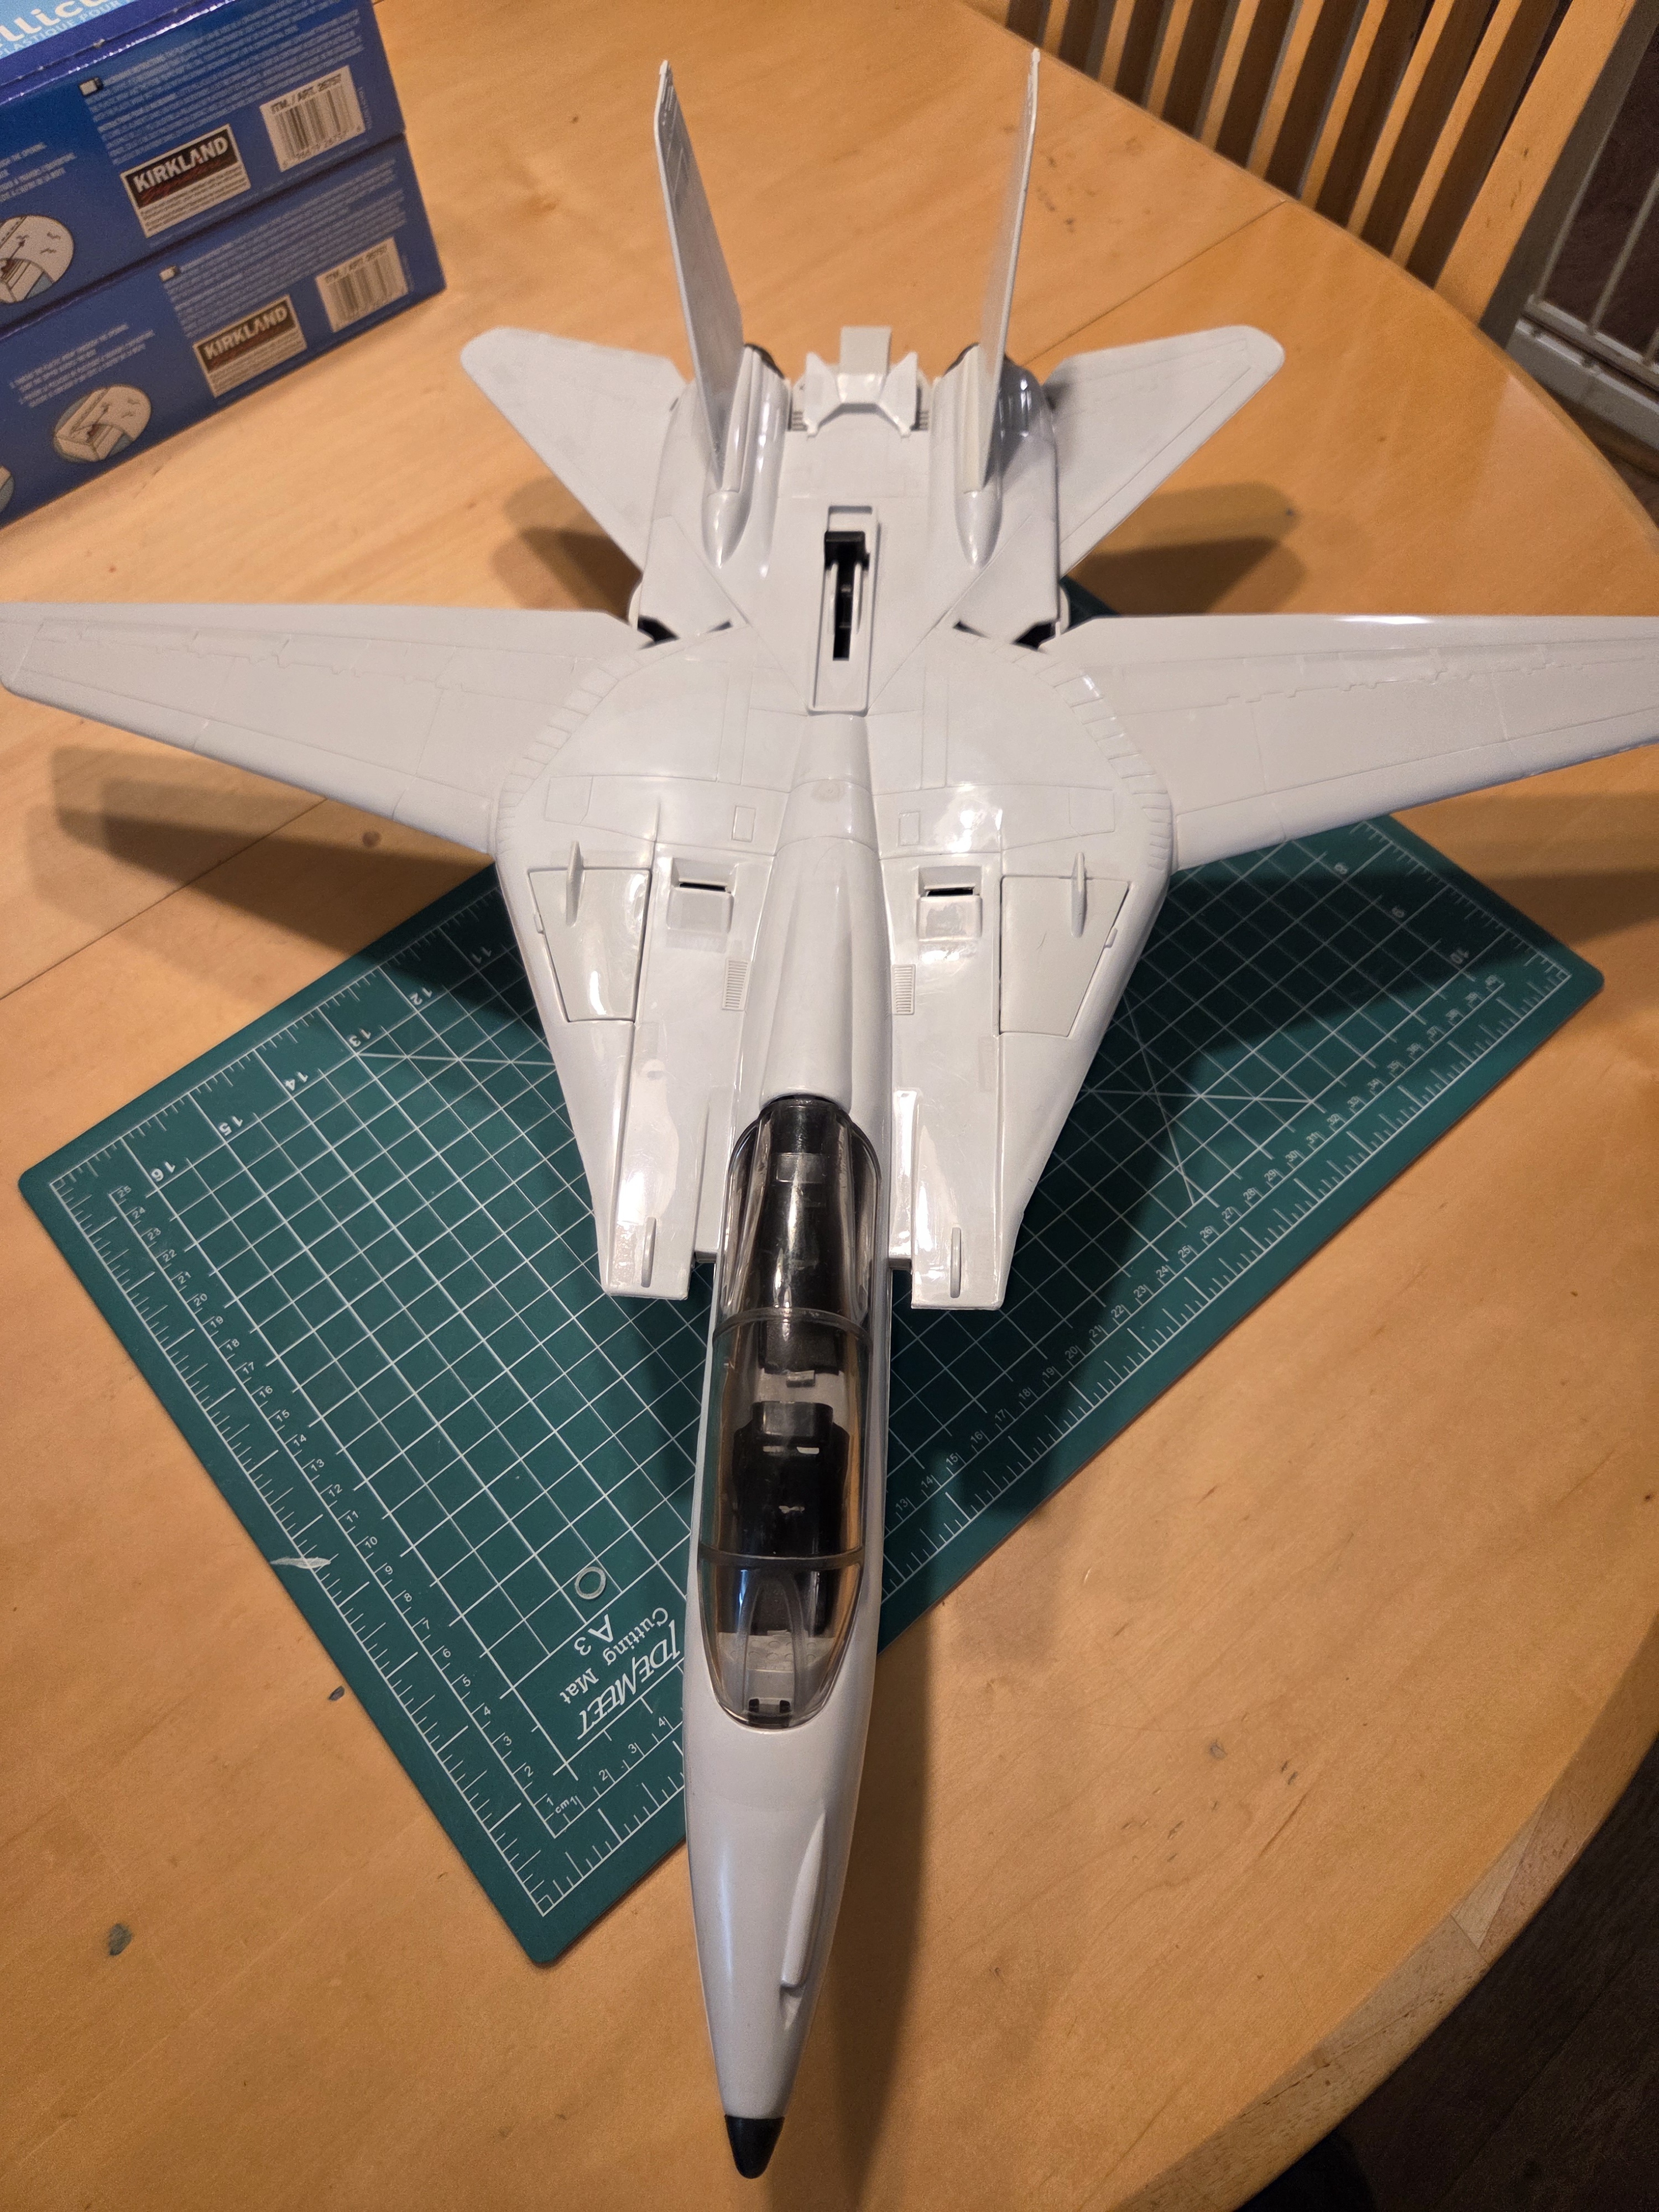
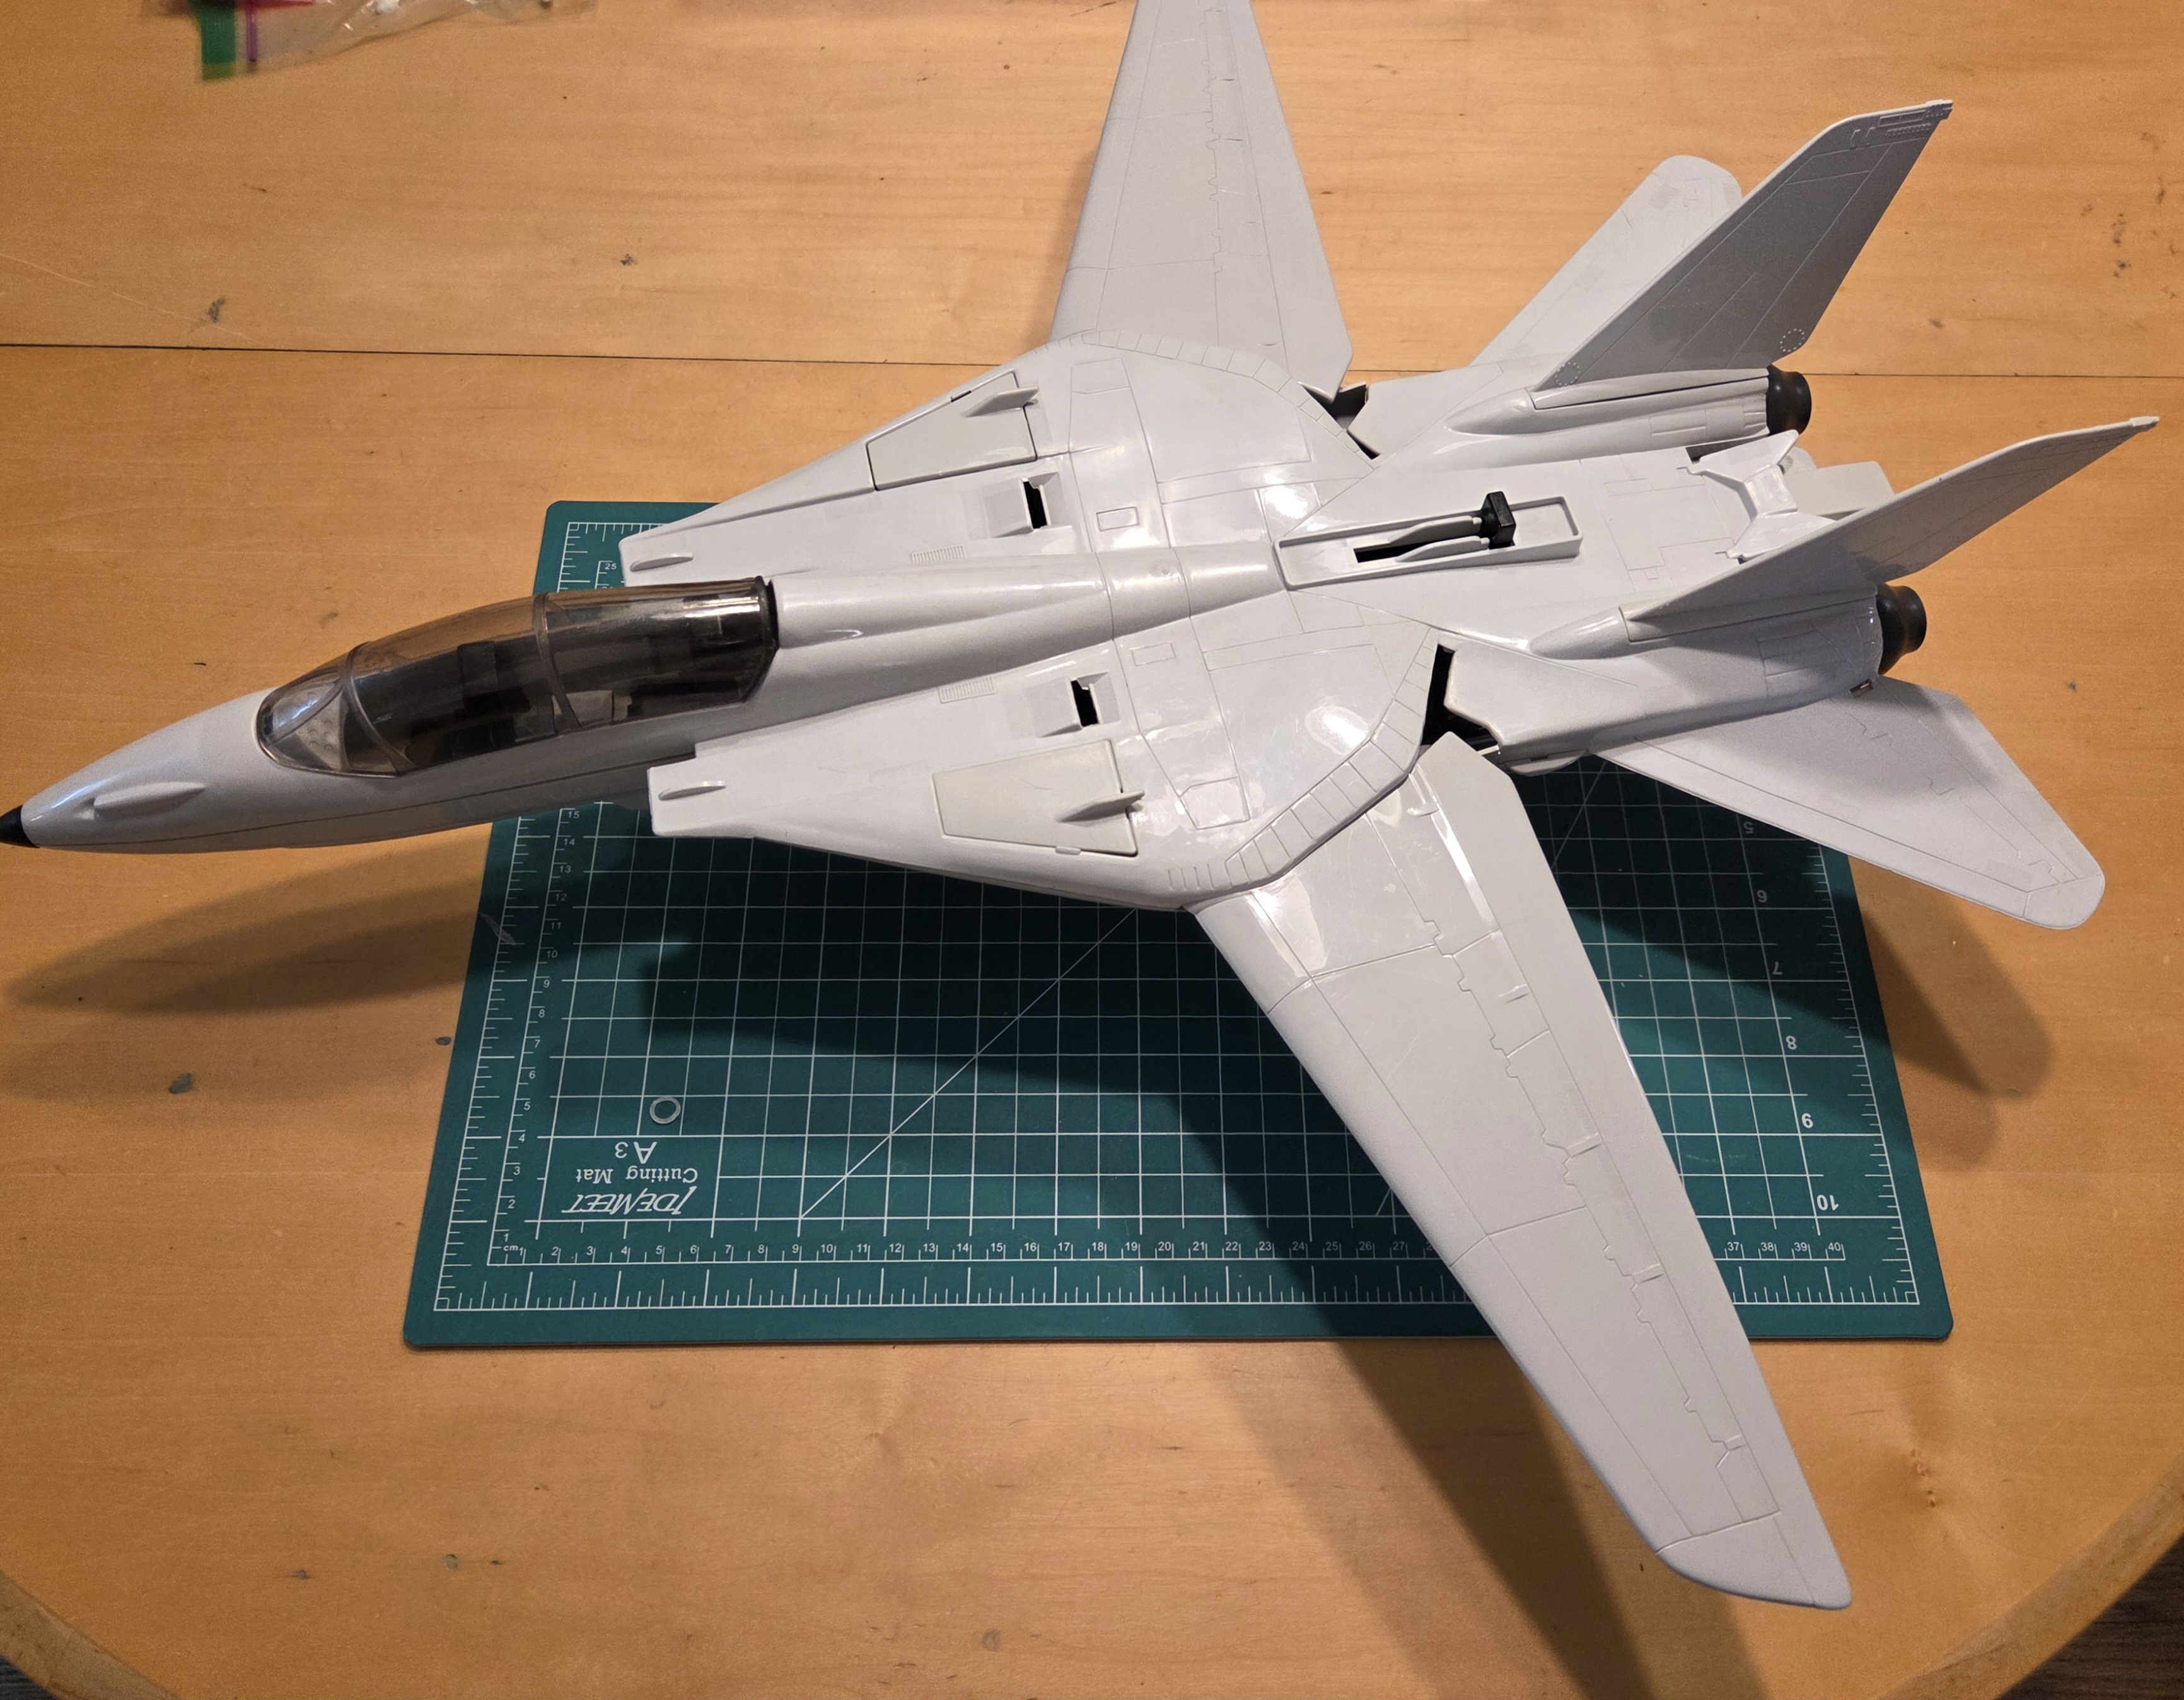
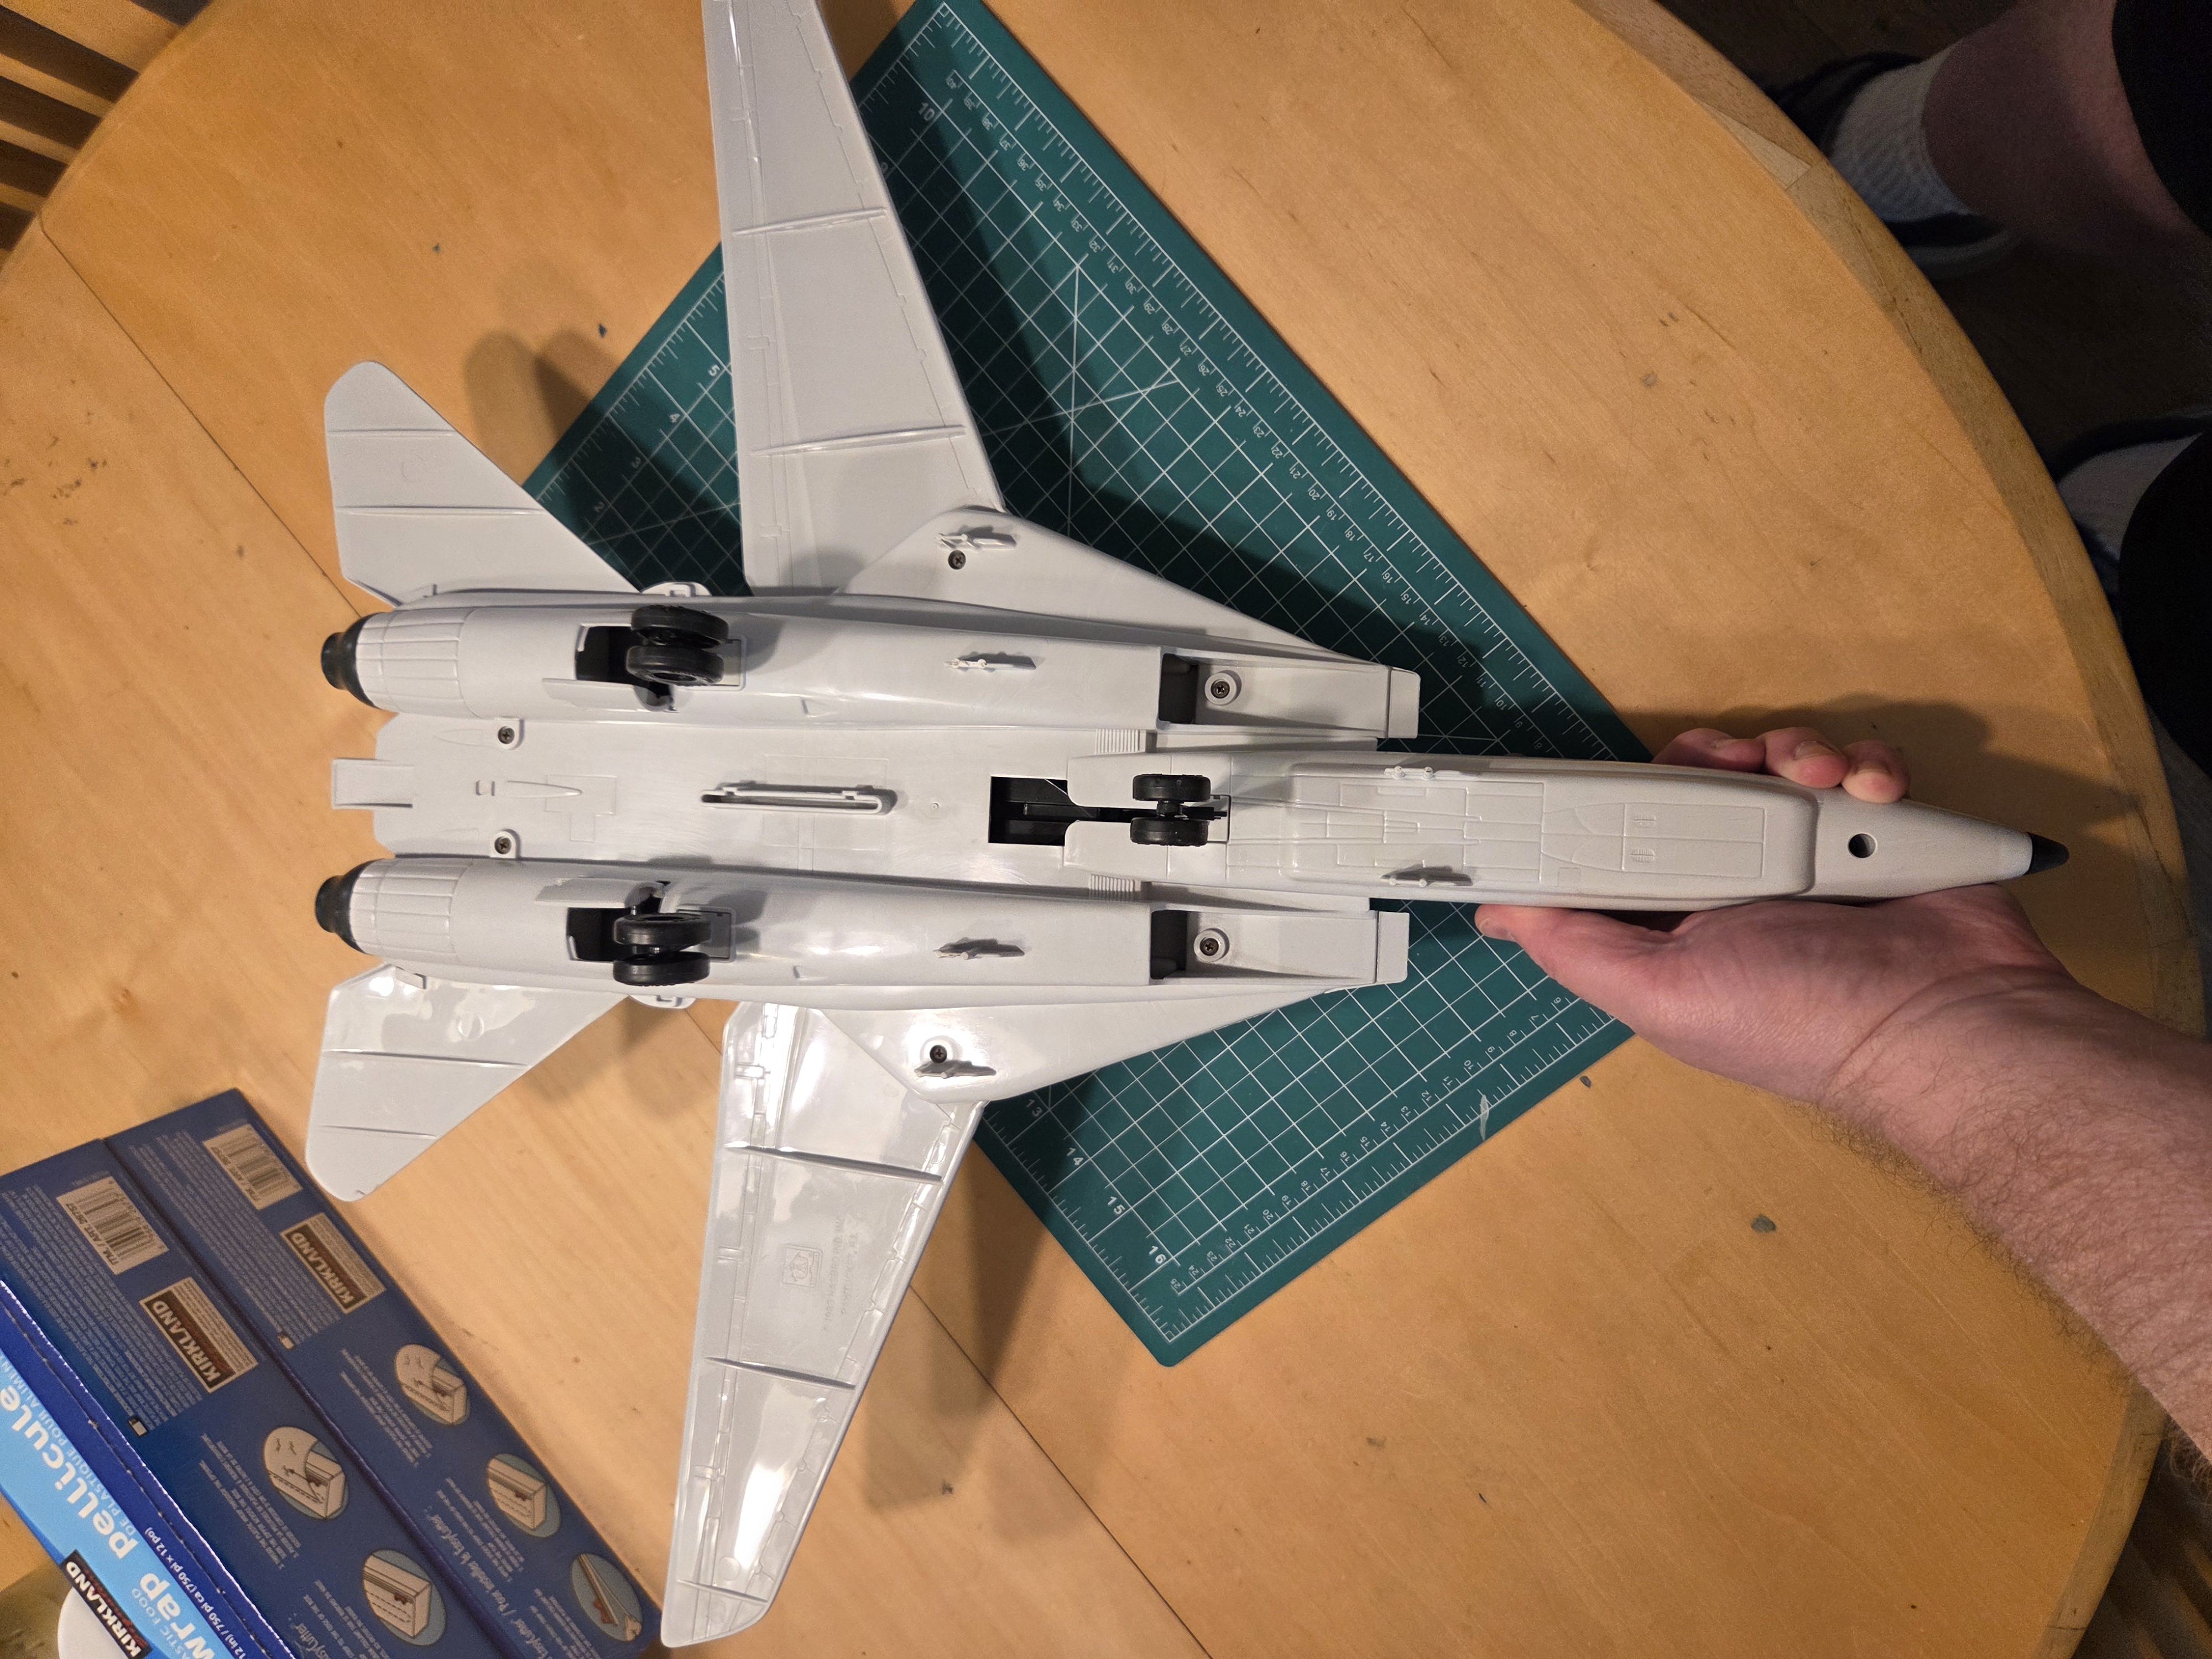
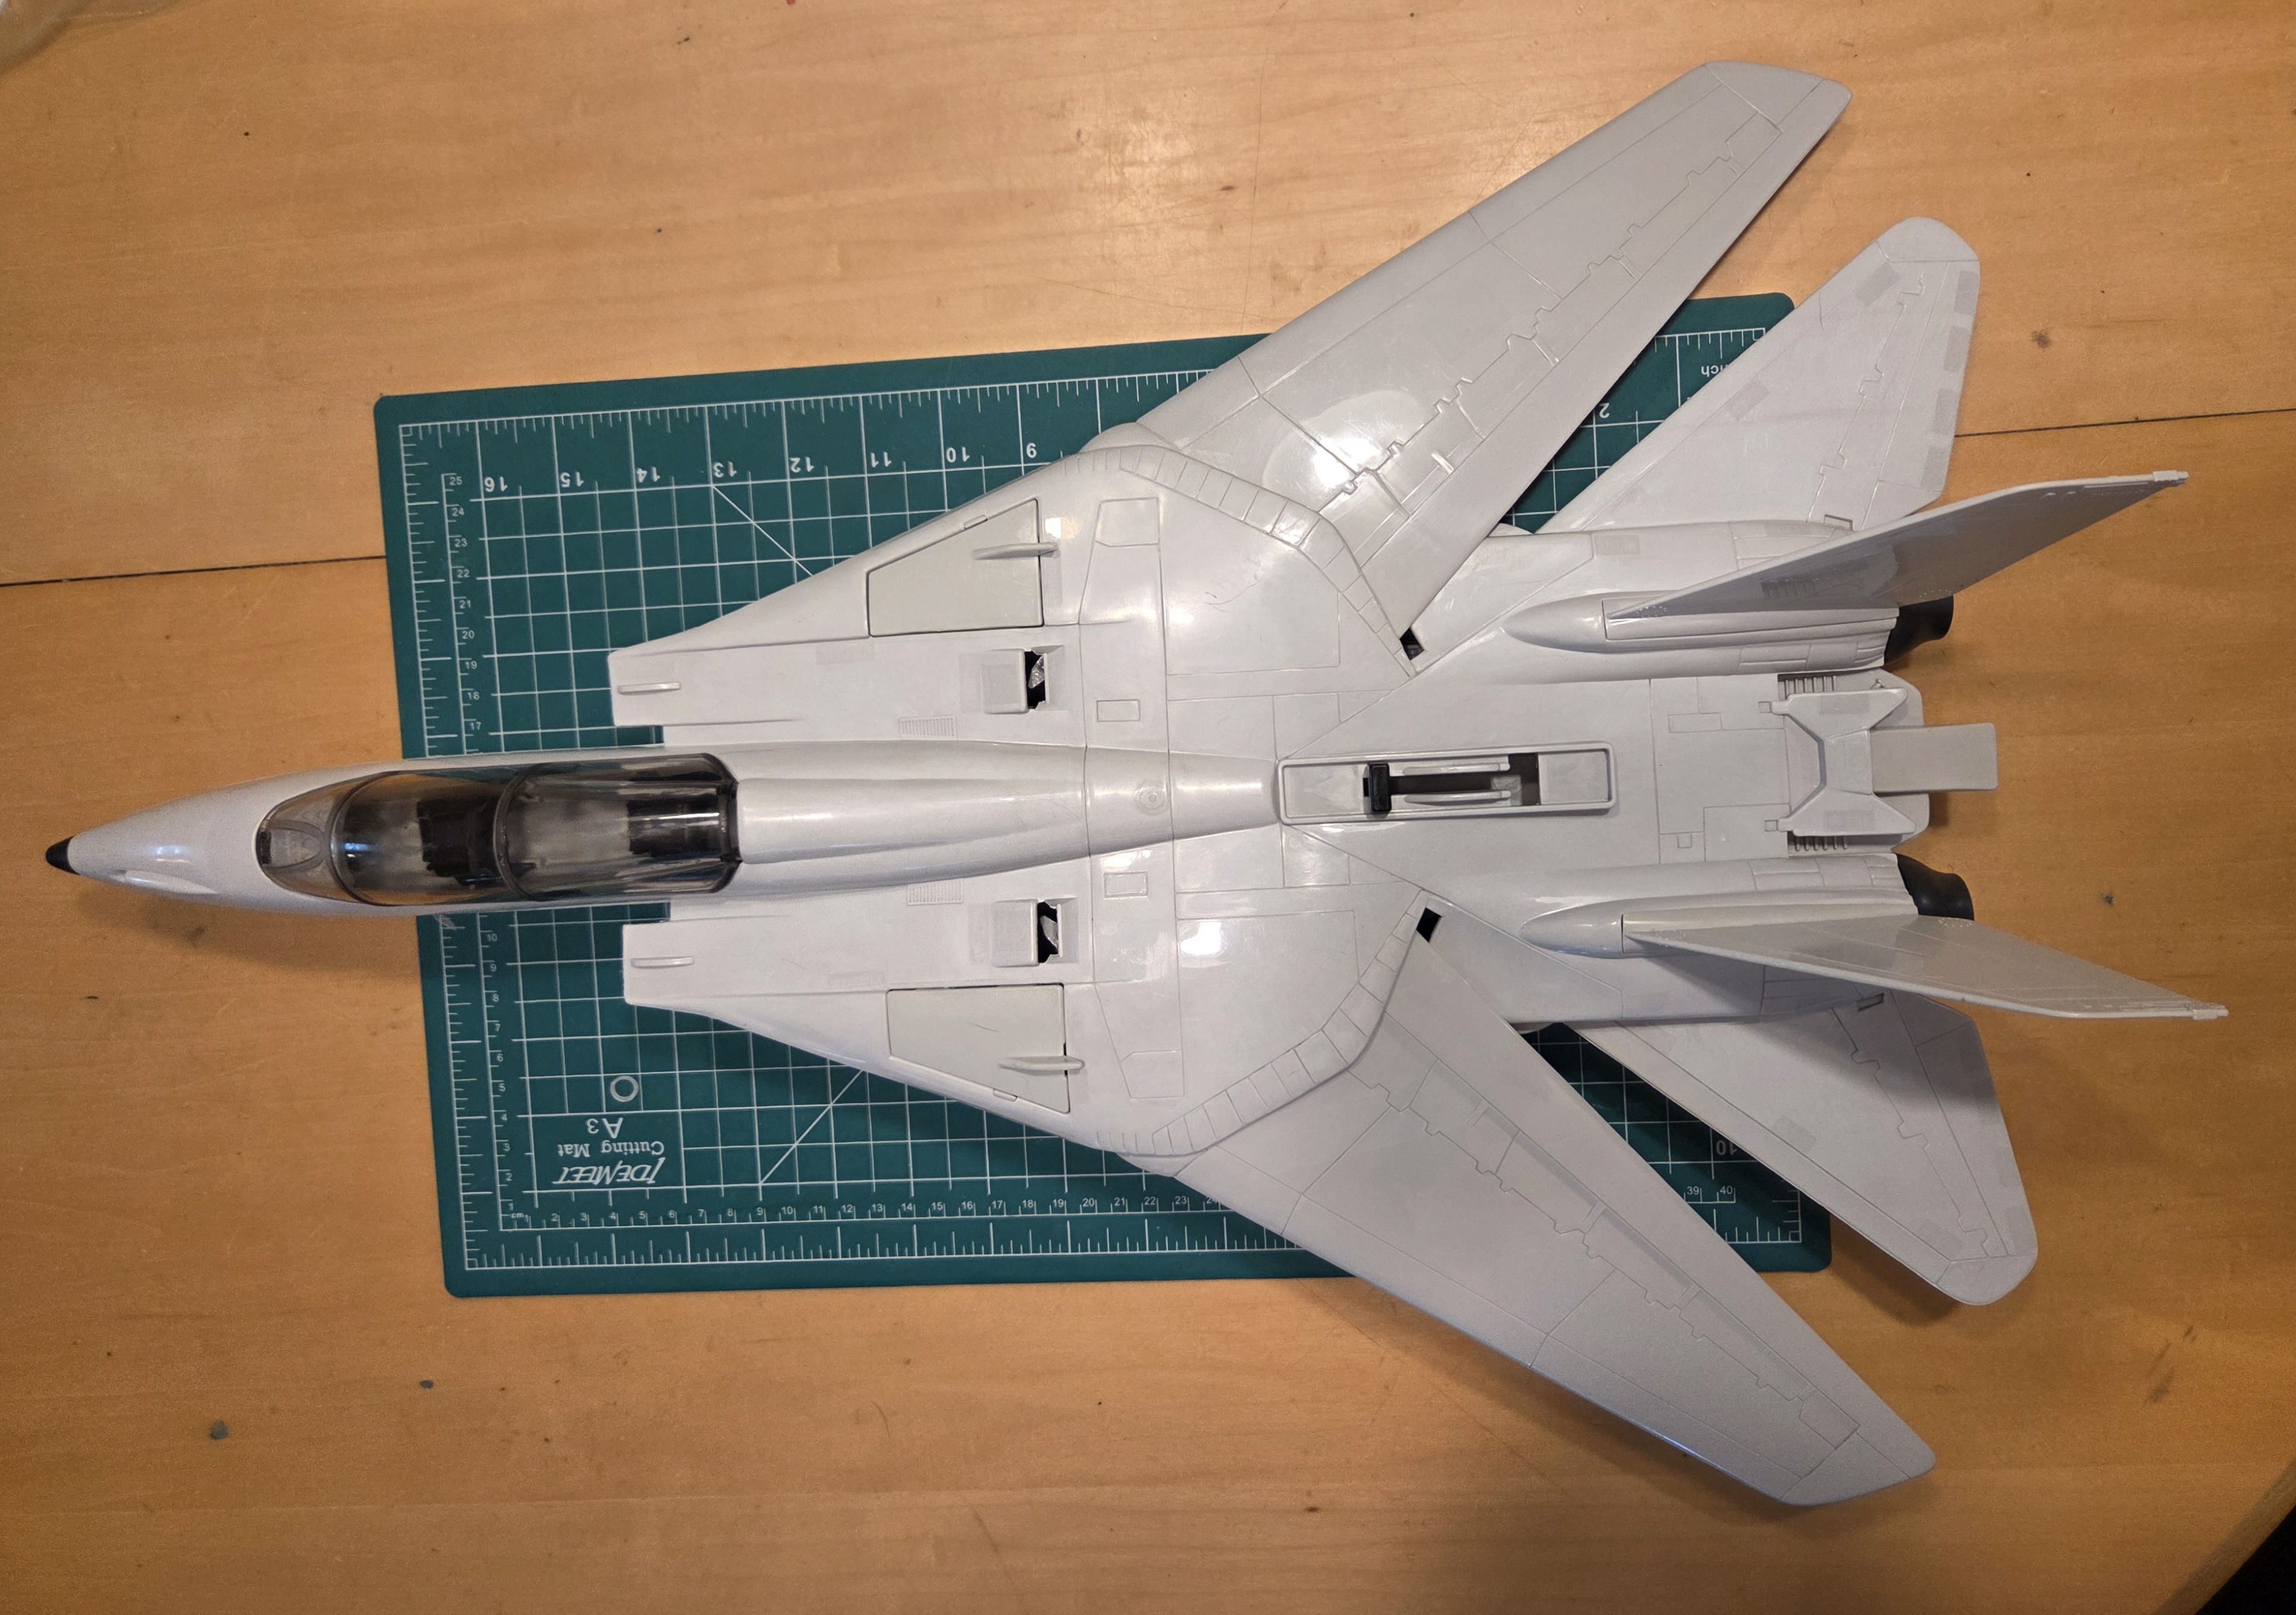
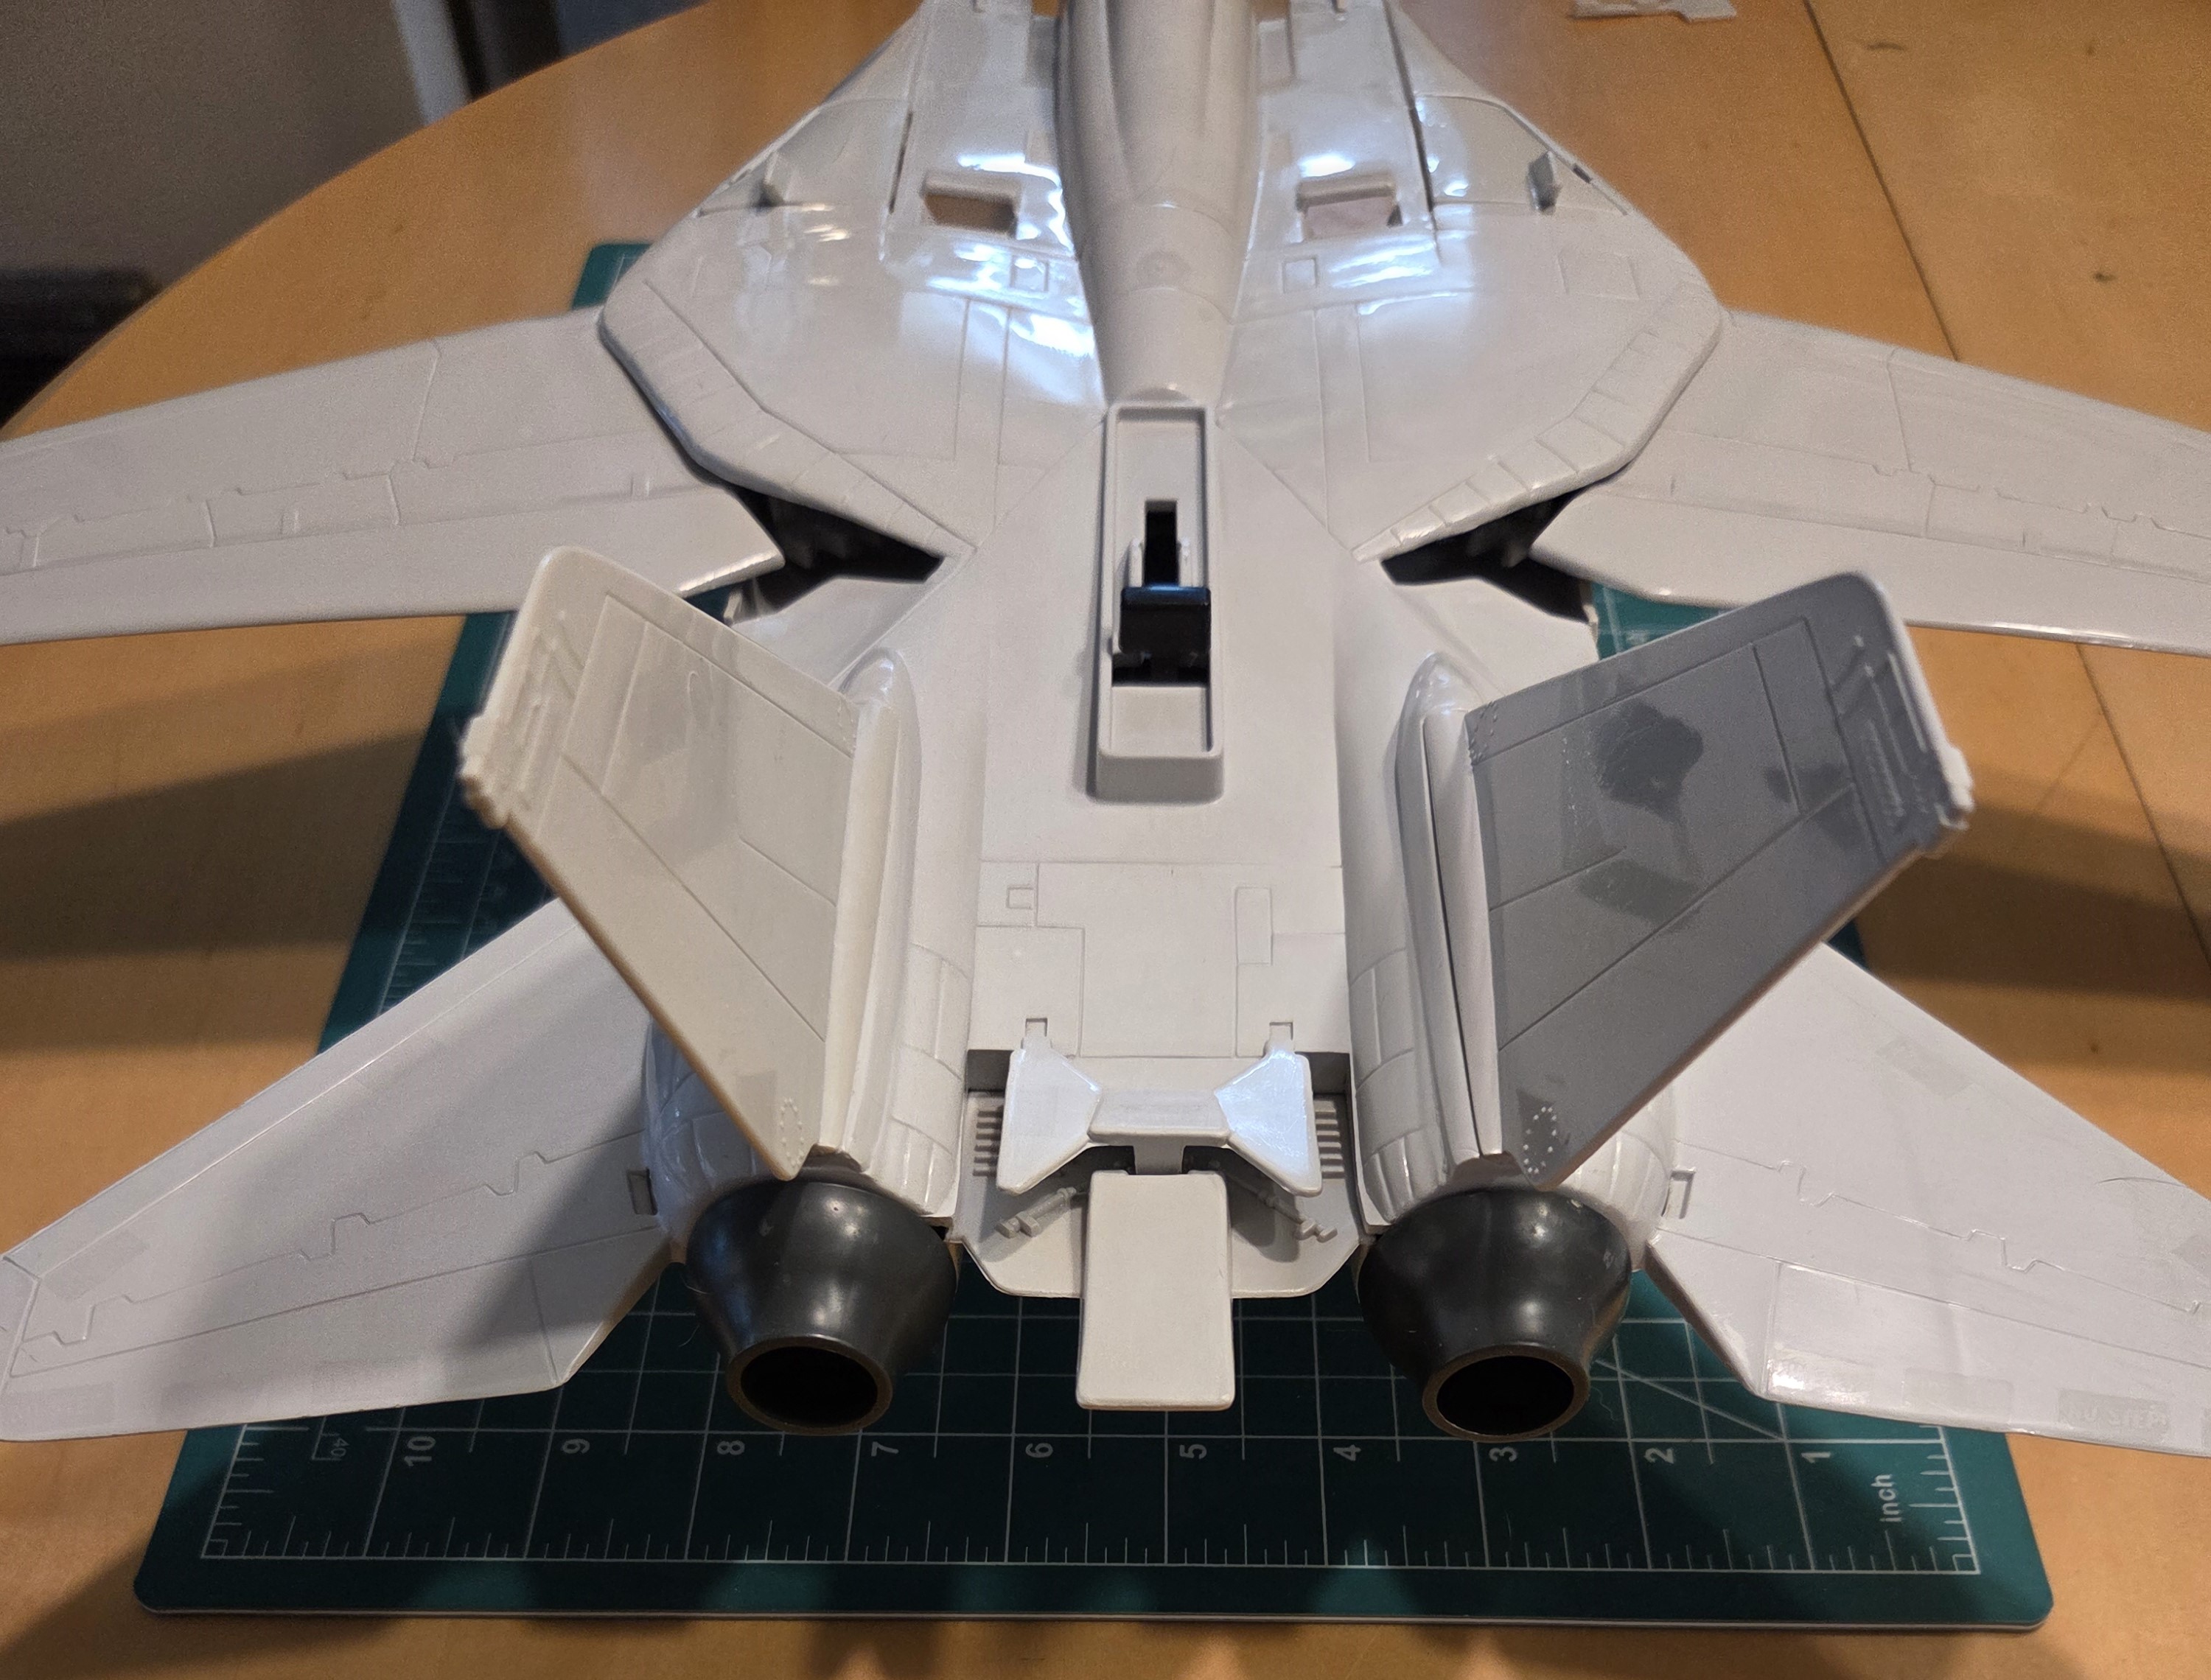
Finally after weeks of planning and patience, it was time to re-assemble the pieces add this now 90% restored Skystriker back into my collection.
Something I didn’t realize I would need until I went to take this apart were the little springs that hold the wheel covers closed when the landing gear are up. Guess what? Mine were missing both. Guess what again? They hard as hell to find and way overpriced. Luckily, people in the restoration community have a workaround. Tiny elastic bands like the kind they use with dental braces do the trick as a good substitution. So I bought some of those and they worked perfectly. (Note: my donor plane DID come with the original springs but I decided to keep those with the donor plane because by this point I determine I would definitely be restoring the donor too)
I took a tip from a YouTube restorer that said when he puts his planes back together he uses some grease on the landing gear mechanism to make it work smoother. I used silicone grease (safe for plastic) and it definitely made the action smoother.
The canopy was trickier to attach than I thought. You really have to twist and force it so it’s no wonder these are always broken. There are a few scratches on the plastic but I felt that after borderline ruining the plastic of the fuselage, I was afraid to try using plastic polish on it to buff out the scratches. So I left them alone.
It is still missing a few missiles and I’ll be adding those here and there (again, surprisingly pricey for some of them) and I still need a good set of repro decals. But otherwise, this project is complete and I think it actually turned out great, despite the almost catastrophic errors during the bleaching process.
Having said all this, I went ahead and tore apart the donor plane and whitened it while I still had all that peroxide. I’m definitely not whitening something this large again anytime soon. I avoided the same mistakes with this one and the final color turned out closer to the original color. It’s still not perfect but compared to where it started it looks great. I’m currently sourcing parts for this one and soon I’ll have doubled my Skystrikers fleet.
This was a fun project, and definitely worth the effort. Yes it cost me a ridiculous amount to restore these, probably the same amount or more as just buying a nice one off eBay but it makes me happy to see my old Skystriker alive and finally complete after all these years. Especially my original. Knowing that I rescued this from the trash bin basically makes me feel good. There’s something I find oddly satisfying about fixing up cast off or broken things and making them like new again. I’m already working on another project, it’s a lot smaller scale and really was a project of opportunity not really something I planned. You’ll be seeing that in a future Toy Chest installment. For now though, thanks for reading!
Let us know what you think of this post in the comments below, share it around the net with the Hashtag #TNBToyChest, or hit up our LinkTree to find where else to connect with us.
Check out our books, with our original horror short story collection, The Camping Trip And Other Stories, our non-fiction book, Doomed: The Collected Essays And Reviews Volume 1, or our collection of original Sci-Fi/Fantasy stories, Brimming With Adventure: Thrilling Tales Of The Nerd Blitz!
Hungry for more of that great Nerd Blitz content, head over to Patreon.com/NerdBlitzPod and join at the $5 level to get instant access to numerous Podcasts, Reviews, Audio Dramas, and so much more!
This has been a feature of TS-D/JA Productions and JJ2E Media